![]()
RedHat Serial Port Console Install(序列埠)
Terminology
RedHat Linux 在安裝的時候可以使用 comport ,進而透過遠端的機器進行安裝作業系統.下面是我的環境.
- Machine #1(Platform:Apoen OS:RHEL AS3 QU3), 這一台將會是透過 Windows(Hyper Terminal) or Linux(#minicom -s) serial port 來幫遠端的機器 Machine #2 進行裝
- Machine #2(Platform:Brandon V OS:RHEL AS3 QU3),這一台機器就是將被安裝的機台,所有的安裝流程都將透過 serial port 由 Machine #1 來安裝作業系統.
Step 1. Attach the Null Modem Cable
首先要使用 null modem(serial port 對 serial port) 將 Machine #1 和 Machine #2 連接在一起 (我將使用 /dev/ttyS0 當範例)
Step 2. Set up the Terminal Program on Machine #1:
首先在 Machine #1 使用 terminal 程式,等待 Machine #2 的訊息由 serial port 傳入.
# For RedHat Linux:
[root@benjr ~]# minicom -s
# For SuSE Linux:
[root@unsvr ~]# screen -S console /dev/ttyS0 115200
# Note:Linux 下還有其他的程式可以使用,如 miterm, kermit.
For Windows:
HyperTerminal 115200, 8, N, 1
Baud Rate,Data bits,Parity,stop bits 可以依據你的需求來設定,這邊我的環境設定為 Baud Rate:115200 ,Data bits:8 , Parity:None ,Stop bits:1
其他如: Putty , Tera-Term 都可以用.
Step 3. Begin the Linux Install on Machine #2:
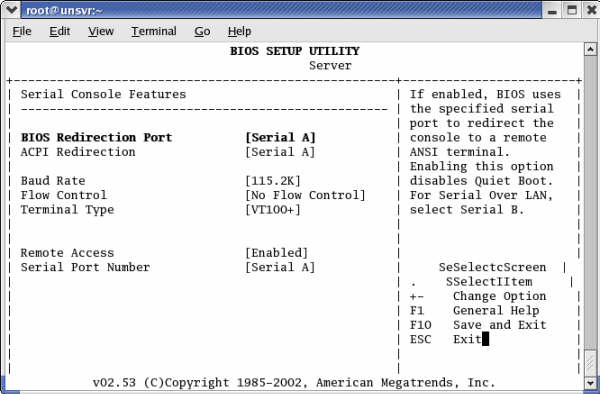
1.如果你的 BIOS 有支援“Serial Console Features”, 那也就將這一些功能打開,在樣連安裝前都能有畫面可以看,設定的值就配合剛剛 Terminal 環境.
BIOS Redirection Port “Serial A”
Baud Rate “115.2K”
Flow Control “No Flow Control”
並選擇由網路開機(如果你的系統沒有 Floppy,或 CDROM).

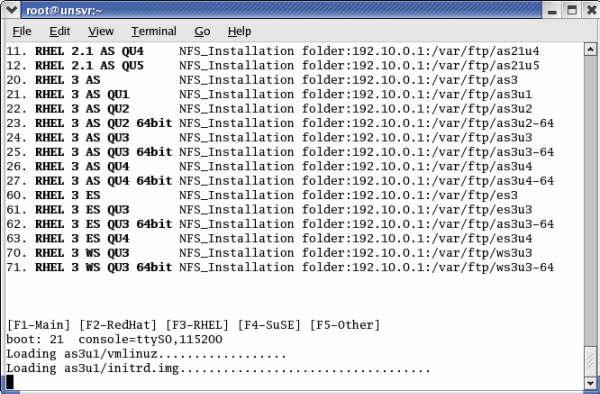
2.在 PXE 環境中在 boot 鍵入下面這一行.
boot: 21 text console=ttyS0,115200
note:21 是我自己的 PXE 的環境 ,關於 PXE 環境設定請參考 PXE linux – https://benjr.tw/83.
or
boot: linux text console=ttyS0,115200
note: linux 使用光碟開機時的選項
如果系統有磁碟機或光碟機,你就可以使用磁片或光碟片來開機.一樣在 boot 的選項中加入,console=ttyS0,115200
也可以直接修改開機光碟,磁片檔 syslinux.cfg
Label linux
Kernel vmlinuz
Append initrd:initrd.img text console=ttyS0,115200
這樣開機就不用加上參數

Step 4. Installing Red Hat Linux on Machine #2:
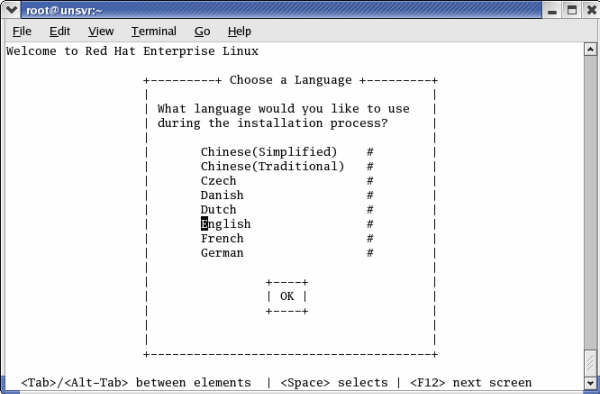
開始安裝作業系統了,方法同文字模式安裝這邊就不多加說明.

Step 5:安裝完成後的設定
基本上 RHEL 安裝完成之後這些設定都會幫我們修改,如果你是安裝後要改成透過 serial port console 來啟動系統時才需要修該設定.
1. /boot/grub/grub.conf
[root@benjr ~]# vi /boot/grub/grub.conf
default=0
timeout=10
# splashimage=(hd0,1)/boot/grub/splash.xpm.gz
serial --unit=0 --speed=115200
terminal timeout=10 serial console
title RedHat Enterprise Linux AS (2.4.21-9.ELsmp)
root (hd0, 0)
kernel /vmlinuz-2.4.21-9.ELsmp ro root=LABEL=/ console=ttyS0,115200,vt100
initrd /initrd-2.4.21-9.EL.img
說明:
[root@benjr ~]# vi /boot/grub/grub.conf
default=0
timeout=10
因為文字模式下無法顯示任何圖片,所以要將這一行刪除或者註記(#)
# splashimage=(hd0,1)/boot/grub/splash.xpm.gz
這三個參數和 GRUB 要從哪個 I/O 輸出有關.
serial --unit=0 --speed=115200
- serial 顯示從 Serial (Console) Port 輸出.
- –unit 決定你的資料要從哪一個 Serial Port (Comport) 出去,unit=0 (/dev/ttyS0), unit=1(/dev/ttyS1)
- –speed 決定了傳輸速度
下面還有其他的參數可使用
- –word=8 傳輸字元可以為7或8 bits
- –parity =no 需要同位元檢查的就選 yes
- –stop=1 需要停止位元就選 1
GRUB 的開機選單.Kernel 參數有加入 console=ttyS0,115200,vt100 ,會將 kernel 的訊息輸出至 Serial Port (Comport) .
terminal timeout=10 serial console
title RedHat Enterprise Linux AS (2.4.21-9.ELsmp)
root (hd0, 0)
kernel /vmlinuz-2.4.21-9.ELsmp ro root=LABEL=/ console=ttyS0,115200,vt100
initrd /initrd-2.4.21-9.EL.img
2./etc/inittab 系統預設不能使用 comport 來登入系統 ,所以要修改一下 /etc/inittab,
[root@benjr ~]# vi /etc/inittab
# Run gettys in standard runlevels
co:2345:respawn:/sbin/agetty ttyS0 115200 vt100
1:2345:respawn:/sbin/mingetty tty1
2:2345:respawn:/sbin/mingetty tty2
3:2345:respawn:/sbin/mingetty tty3
4:2345:respawn:/sbin/mingetty tty4
5:2345:respawn:/sbin/mingetty tty5
6:2345:respawn:/sbin/mingetty tty6
3./etc/securetty 由於 PAM 的限制所以 root 無法使用 comport 登入系統 ,所以還是要修改一下 /etc/securetty:
[root@benjr ~]# vi /etc/securetty
ttyS0
4./etc/sysconfig/kudzu
[root@benjr ~]# vi /etc/sysconfig/kudzu
SAFE=yes
其他參考文件/網址:
/usr/src/linux/Documentation/serial-console.txt
/usr/src/linux/Documentation/kernel-parameters.txt
Remote Serial Console HOWTO – http://www.ibiblio.org/pub/Linux/docs/HOWTO/other-formats/html_single/Remote-Serial-Console-HOWTO.html
有時候文字模式的安裝很不方便,所以如果你有連接上網路時就可以選擇 vnc 來安裝.
boot: 21 text console=ttyS0,115200 vnc
請自行參考 什麼是 VNC – https://benjr.tw/715, Installation via VNC – https://benjr.tw/1
你好,
我想請問一下「在 PXE 環境中在 boot」是什麼意思?
現在的Linux環境中還有這個下command的地方嗎?
對了,我的系統是UEFI的。
PXE (Preboot eXecution Environment) 是透過網路卡開機的方式來安裝作業系統. ,關於 PXE 環境設定請參考 http://benjr.tw/83.
如果是從光碟開機的,可以按上下鍵,會出現 GRUB 選單畫面 (Ubuntu 18.04 虛擬機)
有時候文字模式的安裝很不方便,所以如果你有連接上網路時就可以選擇 vnc 來安裝.
請自行參考 什麼是 VNC – http://benjr.tw/1