![]()
TestLink 需安裝 資料庫系統 MariaDB (MySQL) , Web 伺服器 (Apache 或 Nginx) 與 PHP .
測試環境為 CentOS 8 x86_64 (IP:192.168.31.128)
資料庫 MaraiDB
從 CentOS 7 開始的 Database 都換成了 MariaDB (與 MySQL 資料庫是相容的)
[root@localhost ~]# yum update
[root@localhost ~]# yum install -y mariadb mariadb-server mariadb-devel
檢查一下 MariaDB 的服務狀態.
[root@localhost ~]# systemctl enable mariadb
[root@localhost ~]# systemctl start mariadb
[root@localhost ~]# systemctl status mariadb
● mariadb.service - MariaDB database server
   Loaded: loaded (/usr/lib/systemd/system/mariadb.service; enabled; vendor preset: disabled)
   Active: active (running) since Fri 2017-07-21 11:30:32 CST; 2s ago
  Process: 5733 ExecStartPost=/usr/libexec/mariadb-wait-ready $MAINPID (code=exited, status=0/SUCCESS)
  Process: 5705 ExecStartPre=/usr/libexec/mariadb-prepare-db-dir %n (code=exited, status=0/SUCCESS)
 Main PID: 5732 (mysqld_safe)
   CGroup: /system.slice/mariadb.service
           ├─5732 /bin/sh /usr/bin/mysqld_safe --basedir=/usr
           └─5890 /usr/libexec/mysqld --basedir=/usr --datadir=/var/lib/mysql -...
設定一下 MariaDB
[root@localhost ~]# mysql_secure_installation

NOTE: RUNNING ALL PARTS OF THIS SCRIPT IS RECOMMENDED FOR ALL MariaDB
      SERVERS IN PRODUCTION USE!  PLEASE READ EACH STEP CAREFULLY!

In order to log into MariaDB to secure it, we'll need the current
password for the root user.  If you've just installed MariaDB, and
you haven't set the root password yet, the password will be blank,
so you should just press enter here.

Enter current password for root (enter for none):
OK, successfully used password, moving on...

Setting the root password ensures that nobody can log into the MariaDB
root user without the proper authorisation.

Set root password? [Y/n] y
New password:
Re-enter new password:
Password updated successfully!
Reloading privilege tables..
 ... Success!

By default, a MariaDB installation has an anonymous user, allowing anyone
to log into MariaDB without having to have a user account created for
them.  This is intended only for testing, and to make the installation
go a bit smoother.  You should remove them before moving into a
production environment.

Remove anonymous users? [Y/n] y
 ... Success!

Normally, root should only be allowed to connect from 'localhost'.  This
ensures that someone cannot guess at the root password from the network.

Disallow root login remotely? [Y/n] n
 ... skipping.

By default, MariaDB comes with a database named 'test' that anyone can
access.  This is also intended only for testing, and should be removed
before moving into a production environment.

Remove test database and access to it? [Y/n] Y
 - Dropping test database...
 ... Success!
 - Removing privileges on test database...
 ... Success!

Reloading the privilege tables will ensure that all changes made so far
will take effect immediately.

Reload privilege tables now? [Y/n] y
 ... Success!

Cleaning up...

All done!  If you've completed all of the above steps, your MariaDB
installation should now be secure.

Thanks for using MariaDB!
剛剛就已經設定了 MariaDB root 密碼.登入看看.
[root@localhost ~]# mysql -u root -p
Enter password:
Welcome to the MariaDB monitor.  Commands end with ; or \g.
Your MariaDB connection id is 10
Server version: 5.5.52-MariaDB MariaDB Server

Copyright (c) 2000, 2016, Oracle, MariaDB Corporation Ab and others.

Type 'help;' or '\h' for help. Type '\c' to clear the current input statement.

MariaDB [(none)]> show databases;
+--------------------+
| Database           |
+--------------------+
| information_schema |
| mysql              |
| performance_schema |
+--------------------+
3 rows in set (0.01 sec)

MariaDB [(none)]> exit;
Bye
資料庫的安裝就告一段落了,後面需要安裝 TestLink 但在這之前需要啟動 web server (Apache).
Apache (Httpd)
Web Server 可以自行選擇 Apache 或是 Nginx .下面使用的是 Apache
[root@localhost ~]# yum install -y httpd
[root@localhost ~]# systemctl enable httpd
Created symlink from /etc/systemd/system/multi-user.target.wants/httpd.service to /usr/lib/systemd/system/httpd.service.
[root@localhost ~]# systemctl start httpd
[root@localhost ~]# systemctl status httpd
● httpd.service - The Apache HTTP Server
   Loaded: loaded (/usr/lib/systemd/system/httpd.service; enabled; vendor preset: disabled)
   Active: active (running) since Fri 2017-07-21 12:03:23 CST; 5s ago
     Docs: man:httpd(8)
           man:apachectl(8)
 Main PID: 6418 (httpd)
   Status: "Processing requests..."
   CGroup: /system.slice/httpd.service
           ├─6418 /usr/sbin/httpd -DFOREGROUND
           ├─6419 /usr/sbin/httpd -DFOREGROUND
           ├─6420 /usr/sbin/httpd -DFOREGROUND
           ├─6421 /usr/sbin/httpd -DFOREGROUND
           ├─6422 /usr/sbin/httpd -DFOREGROUND
           └─6423 /usr/sbin/httpd -DFOREGROUND

如果連不上請先確一下 Firewall 的狀態.
[root@localhost ~]# systemctl stop firewalld
CentOS 8 搭配的 Apache 沒有預設網頁,可以自行建立 index.html 來測試.
[root@localhost ~]# echo Apache on CentOS 8 > /var/www/html/index.html
PHP
TestLink 主要透過 PHP 的程式語言架構出來的,而 PHP 是一種直譯式的程式語言,用於網頁的撰寫,不同於靜態式的 HTML 它可以依據使用者的需求來呈現不同的網頁內容.
安裝所需套件.
[root@localhost ~]# yum install -y php php-pdo php-pecl-zip php-json php-common php-fpm php-mbstring php-cli php-mysqlnd php-xml php-gd
CentOS 8 的 Apache, 預設使用 PHP-FPM 執行 PHP , httpd 重新啟動時會啟動 PHP-FPM 服務.
[root@localhost ~]# systemctl restart httpd
[root@localhost ~]# systemctl status php-fpm
順便試一下 PHP 功能運作是否正常.可以使用編輯器來鍵入 PHP 程式碼,內容如下 (檔案需儲存在 /var/www/html – Apache 預設的目錄),或是透過 echo 直接產生.
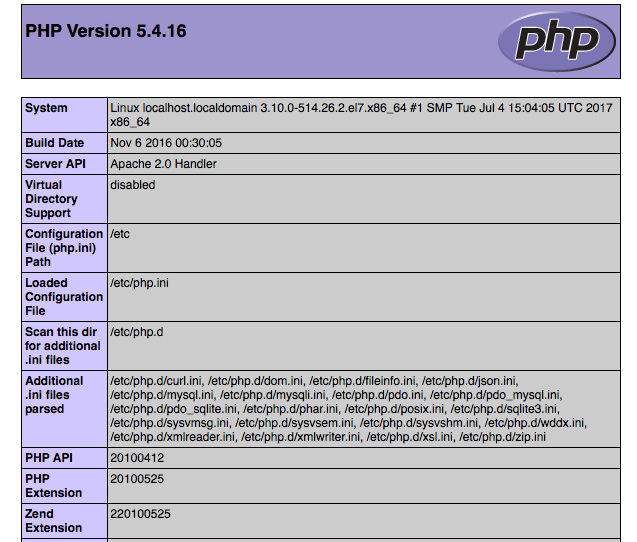
[root@localhost ~]# echo "<?php phpinfo() ?>" > /var/www/html/phpinfo.php
/var/www/html 是 Apache 預設的目錄,你可以修改 /etc/httpd/conf/httpd.conf 修改 DocumentRoot .
這是 PHP 的格式,開啟你的網頁連上你 http://localhost/phpinfo.php ,如果一切運作正常那你會看到和下面一樣的網頁.
TestLink
直接去 GitHub 下載 TestLink.
[root@localhost ~]# git clone https://github.com/TestLinkOpenSourceTRMS/testlink-code.git
並複製到 Apach document Root 的路徑 /var/www/html/
[root@localhost ~]# rsync -avP testlink-code/ /var/www/html/
TestLink 還需要額外幾個目錄,並須開啟 write 權限給 httpd (Apache user 為 apache)
[root@localhost ~]# mkdir -p /var/testlink/logs/
[root@localhost ~]# mkdir -p /var/testlink/upload_area/
[root@localhost ~]# chown apache:apache /var/www/html/gui/templates_c
[root@localhost ~]# chown apache:apache /var/testlink/logs/
[root@localhost ~]# chown apache:apache /var/testlink/upload_area/
以下幾個為 TestLink 建議 php 的設定值.
[root@localhost ~]# cd /var/www/html/
[root@localhost html]# vi .user.ini
max_execution_time = 120
memory_limit = 256M
session.gc_maxlifetime = 3000
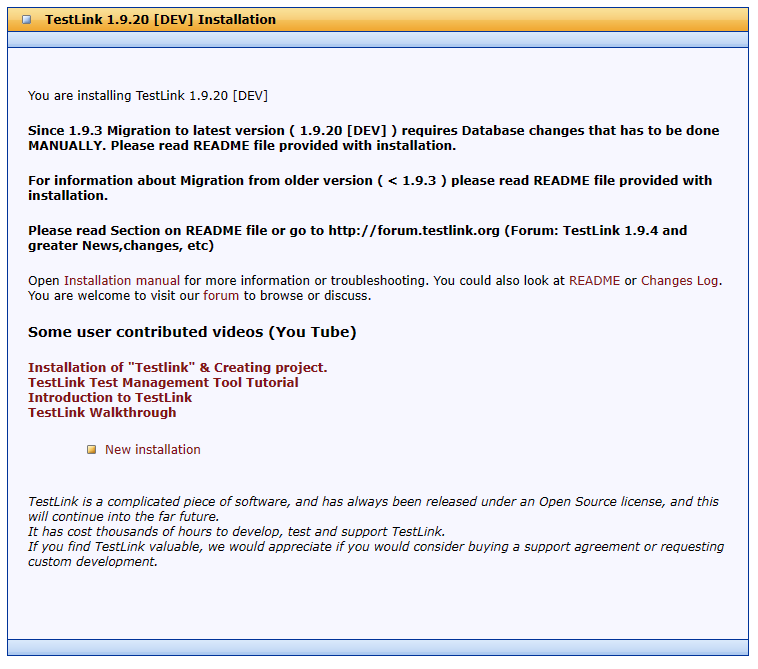
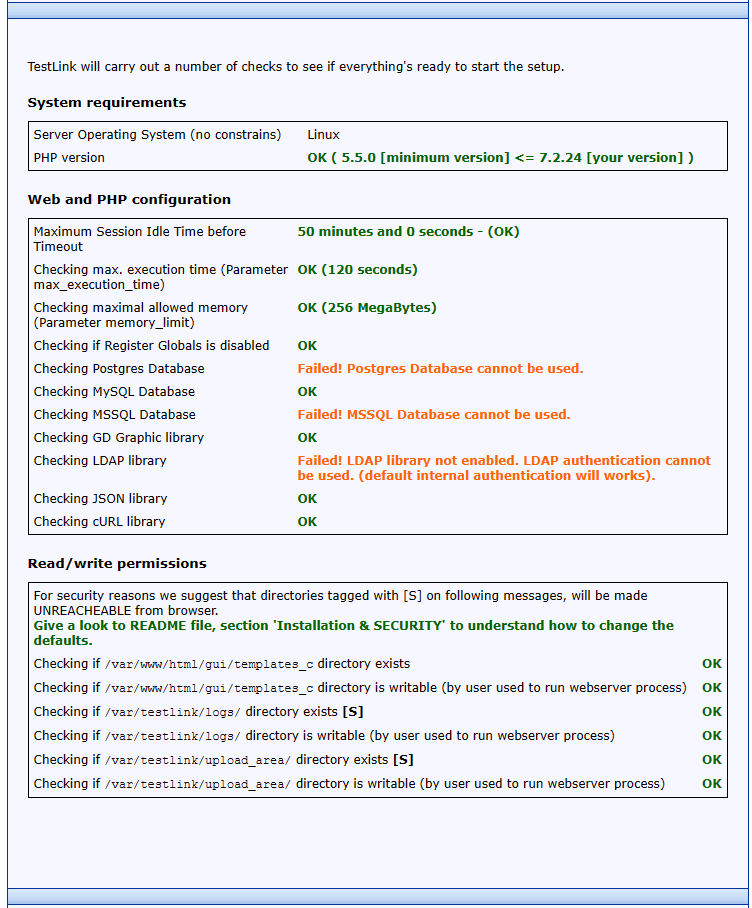
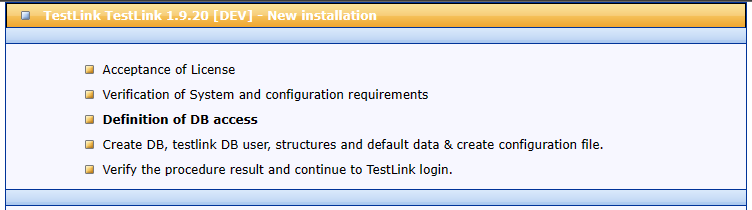
回到瀏覽器 http://192.168.31.128/install/index.php 並選擇 New installation
I agree to the terms set out in this license. / Continue
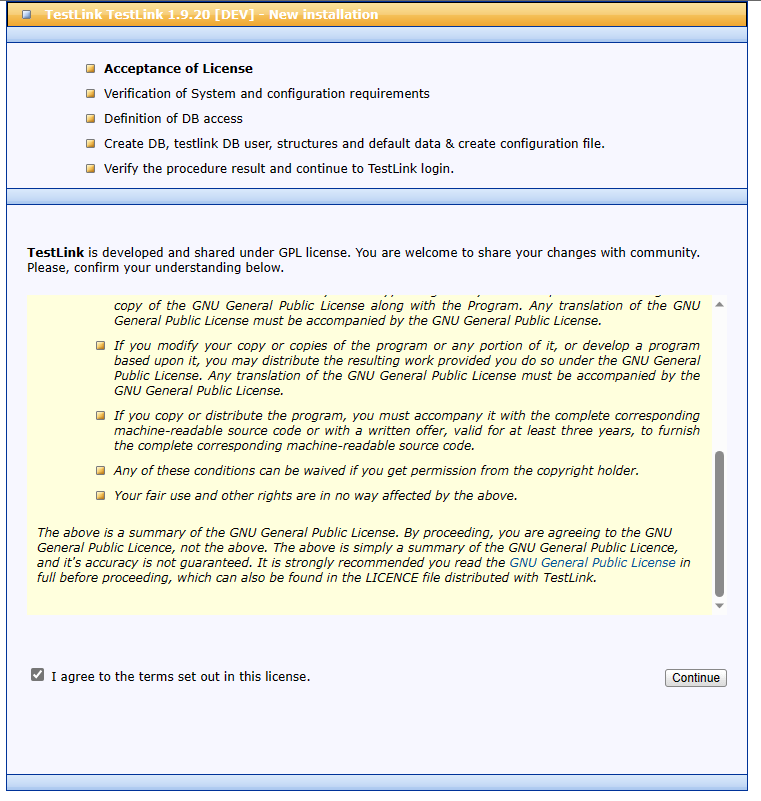
如果前面都做對,就可以繼續下一步.
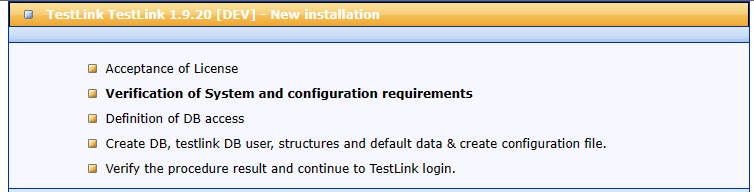
這邊需要輸入 DB 的 administrator (root) 帳號密碼,來幫 TestLink 建立所需的資料庫,資料表與存取使用者.
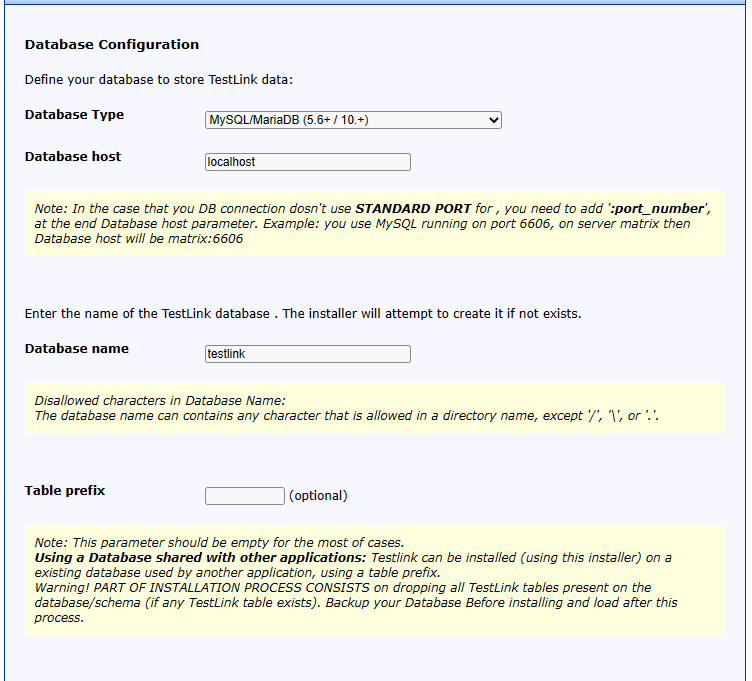
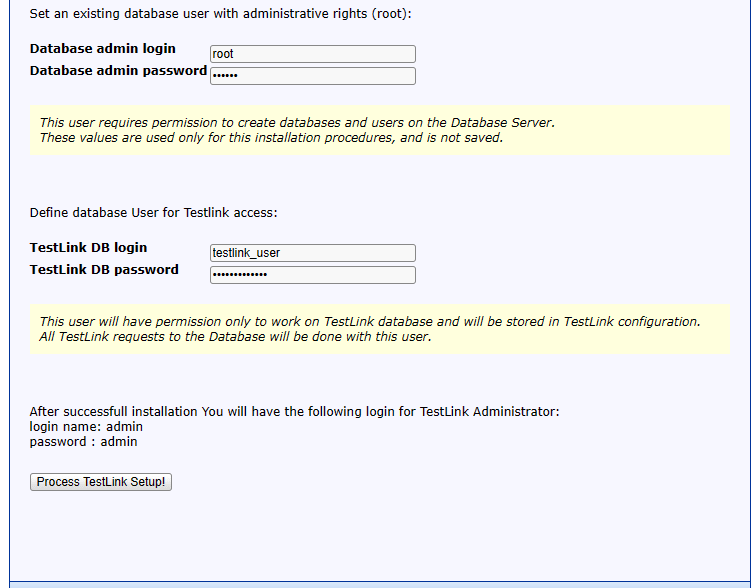
最後把設定值寫到 config_db.inc.php 檔案即可.
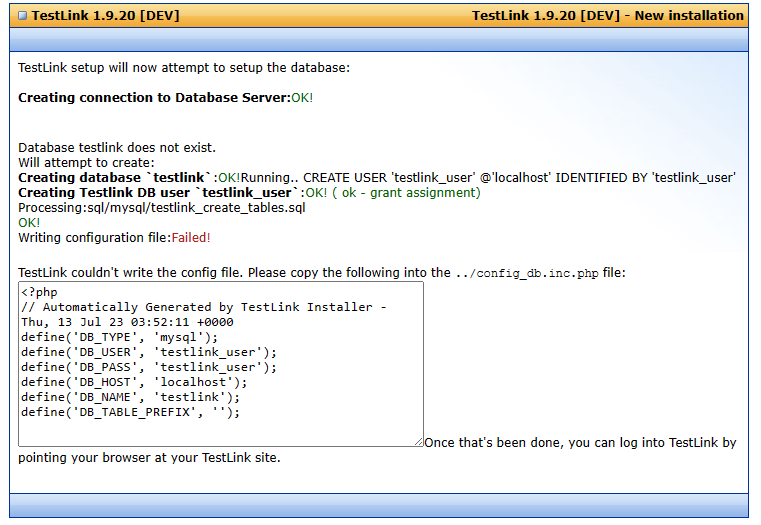
[root@localhost html]# vi config_db.inc.php
<?php
// Automatically Generated by TestLink Installer - Thu, 13 Jul 23 03:54:55 +0000
define('DB_TYPE', 'mysql');
define('DB_USER', 'testlink_user');
define('DB_PASS', 'testlink_user');
define('DB_HOST', 'localhost');
define('DB_NAME', 'testlink');
define('DB_TABLE_PREFIX', '');
回到瀏覽器 http://192.168.31.128 就可以開始登入使用 TestLink 了,預設帳號密碼皆為 admin / admin.
其他設定
- UDFStripHTMLTags
後續發現還要設定一下,沒設定會出現以下訊息.errormsg:execute command denied to user 'admin'@'localhost' for routine 'testlink.UDFStripHTMLTags'
須執行以下 SQL 指令,DB 內容須修改為符合自己環境的 DB 名稱.
[root@localhost ~]# cat /var/www/html/testlink/install/sql/mysql/testlink_create_udf0.sql
# TestLink Open Source Project - http://testlink.sourceforge.net/
# This script is distributed under the GNU General Public License 2 or later.
# ---------------------------------------------------------------------------------------
# @filesource testlink_create_udf0.sql
#
#
USE `testlink`; /* Replace before run */
DROP function IF EXISTS `UDFStripHTMLTags`;

DELIMITER $$
USE `testlink`$$ /* Replace before run */
CREATE FUNCTION `UDFStripHTMLTags`(Dirty TEXT) RETURNS TEXT CHARSET utf8
BEGIN
DECLARE iStart, iEnd, iLength int;
   WHILE Locate( '<', Dirty ) > 0 And Locate( '>', Dirty, Locate( '<', Dirty )) > 0 DO
      BEGIN
        SET iStart = Locate( '<', Dirty ), iEnd = Locate( '>', Dirty, Locate('<', Dirty ));
        SET iLength = ( iEnd - iStart) + 1;
        IF iLength > 0 THEN
          BEGIN
            SET Dirty = Insert( Dirty, iStart, iLength, '');
          END;
        END IF;
      END;
    END WHILE;
RETURN Dirty;
END$$
並需到 MySQL (MariaDB) 設定函數執行權限.
MariaDB [(none)]> GRANT EXECUTE ON testlink.* TO testlink_user@localhost;
- 資料庫編碼 utf8mb4
搜尋時會顯示一下錯誤代表當初測設定資料庫編碼非 utf8mb4 ,沒設定會出現以下訊息.errormsg:Incorrect string value: '\xEF\x83\xA0 ve...' for column ``.``.`Dirty` at row 1
需要 MySQL (MariaDB) 設定資料庫編碼為 utf8mb4.
MariaDB [(none)]> ALTER DATABASE testlink CHARACTER SET utf8mb4 COLLATE utf8mb4;
Benjr您好,我看您在TestLink初始化Define database User login那個部分
user是填入,testlink_user
所以需要在”剛剛就已經設定了 MariaDB root 密碼.登入看看.”之後,輸入建立User指令嗎?
E.g.: CREATE USER ‘testlink_user’@’localhost’ IDENTIFIED BY ‘password’;
還是說不輸入也不影響使用呢?