![]()
測試環境為 Ubuntu 16.04 Desktop 64bits
Ubuntu 預設是不能使用 root 來登入,只能用一般使用來登入,然後透過 #sudo su – 切換身份 或是 gksudo(Graphically sudo) https://benjr.tw/1273 等方式來執行一些特權指令.
下面步驟可以讓使用者在登入時選擇 root 來登入.
首先先設定 root 的密碼.
ben@ubuntu:~$ sudo -i passwd root
Enter new UNIX password:
Retype new UNIX password:
passwd: password updated successfully
Text
Ubuntu Desktop 預設為 GUI 模式,可以透過 systemctl 來改成文字模式.
ben@ubuntu:~$ sudo systemctl get-default
graphical.target
ben@ubuntu:~$ sudo systemctl set-default multi-user.target
Created symlink from /etc/systemd/system/default.target to /lib/systemd/system/multi-user.target.
ben@ubuntu:~$ sudo systemctl isolate multi-user.target
ben@ubuntu:~$ sudo systemctl get-default
multi-user.target
剛剛我們已經有設定過 root 的密碼了,其實這樣就可以在文字模式用 root 的身份來登入.
Text-Autologin
如果想設定自動登入需修改設定檔 /lib/systemd/system/getty@.service
ben@ubuntu:~$ sudo vim /lib/systemd/system/getty@.service
ExecStart=-/sbin/agetty --autologin root --noclear %I $TERM
#ExecStart=-/sbin/agetty --noclear %I $TERM
把原先的 ExecStart=-/sbin/agetty –noclear %I $TERM 修改成為 ExecStart=-/sbin/agetty –autologin root –noclear %I $TERM 即可.
GUI – lightdm
剛剛改成文字模式了,要透過 systemctl 來設定.
ben@ubuntu:~$ sudo systemctl get-default
multi-user.target
ben@ubuntu:~$ sudo systemctl set-default graphical.target
Removed symlink /etc/systemd/system/default.target.
Created symlink from /etc/systemd/system/default.target to /lib/systemd/system/graphical.target.
ben@ubuntu:~$ sudo systemctl isolate graphical.target
ben@ubuntu:~$ sudo systemctl get-default
graphical.target
Ubuntu 預設的登入管理 login managers 系統是 lightdm,所以直接針對 lightdm.conf 修改 (沒這個檔案就直接編輯新的即可)
ben@ubuntu:~$ sudo vi /etc/lightdm/lightdm.conf
[sudo] password for ben:
[SeatDefaults]
greeter-session=unity-greeter
user-session=ubuntu
greeter-show-manual-login=true
Ubuntu 需要重新開機.
ben@ubuntu:~$ sudo reboot
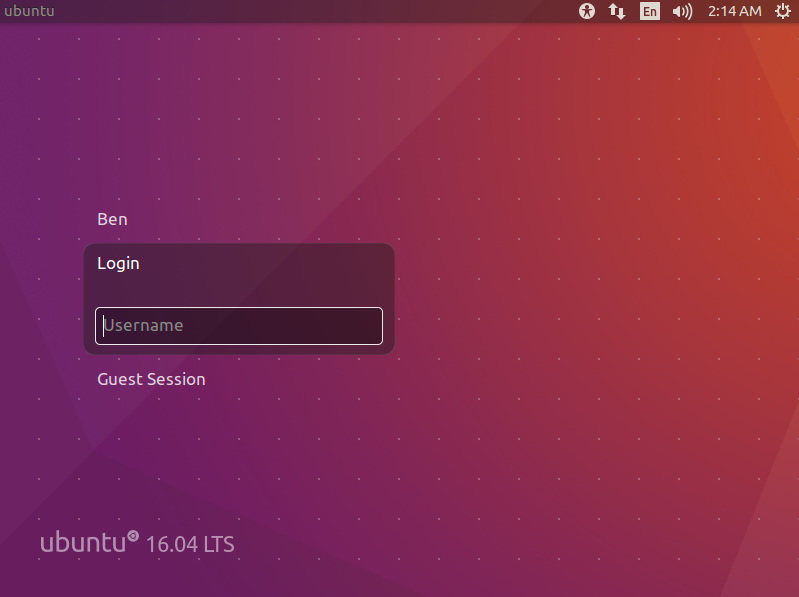
重開機後多了一個 Login 的選項,這邊就可以輸入 root 帳號以及密碼即可登入.
如果是其他的登入管理 login managers 系統,請參考
- In GDM
Edit /etc/gdm/custom.conf file and include AllowRoot=true. - In KDM
Edit /etc/kde4/kdm/kdmrc file and change AllowRootLogin=false for AllowRootLogin=true.
使用 root 登入後會顯示錯誤訊息
mesg: ttyname failed inappropriate ioctl for device
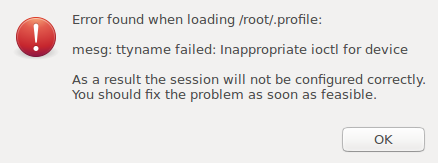
需要修改 /root/.profile (在 mesg n || true 前面加入 tty -s &&)
# mesg n || true
tty -s && mesg n || true
指令說明:
- tty -s
tty – print the file name of the terminal connected to standard input ,
-s –silent, –quiet , print nothing, only return an exit status - mesg n
mesg – display (or do not display) messages from other users, y 允許使用者將訊息顯示在螢幕上, N 則不允許. - true
do nothing, successfully
&& , || 的用法
cmd1 && cmd2 若 cmd1 執行正確且無錯誤 ($?=0),則執行 cmd2 ,反之若 cmd1 執行完畢且為錯誤 ($?≠0),則 cmd2 不執行.
cmd1 || cmd2 若 cmd1 執行正確且無錯誤 ($?=0),則 cmd2 不執行 ,反之若 cmd1 執行完畢且為錯誤 ($?≠0),則開始執行 cmd2.
tty -s && mesg n || true 的語法是常用的架構 (這 && 與 || 的順序就是固定),用以判斷 command1 的執行是成功還是失敗,成功則執行 command2 失敗則執行 command 3
簡化一下剛剛的指令
tty -s && mesg n || true
tty -s 成功後 ($?=0) 執行 mesg n ,因為 $?=0 所以後半段 || true 就不會去執行了.
tty -s 失敗後 ($?≠0) ,不執行 mesg n ,因為 $?≠0 所以後半段 || 就會去執行 true 了.
當有 tty 時會去執行 mesg n ,沒有就不執行(不懂為什麼要這樣設定).
SSH
雖然前面已經幫 root 設定密碼了,但是 SSH 預設不讓 root 登入.
Ben-MacBook-Air:~ Ben$ ssh root@192.168.95.221
root@192.168.95.221's password:
Permission denied, please try again.
如果要讓 Root 可以登入,需要修改 SSH 設定檔 sshd_config
ben@ubuntu:~$ sudo vim /etc/ssh/sshd_config
#PermitRootLogin prohibit-password
PermitRootLogin yes
ben@ubuntu:~$ sudo systemctl restart sshd
這樣就 SSH 可以就可以透過 root 登入了.
Ben-MacBook-Air:~ Ben$ ssh root@192.168.95.221
root@192.168.95.221's password:
Welcome to Ubuntu 16.04.6 LTS (GNU/Linux 4.15.0-46-generic x86_64)
One thought on “Ubuntu 16.04 – root login”