![]()
有時候設定一些跟網路相關的服務 PXE , DHCP , FTP , TFTP , HTTP …,服務雖然是啟動的,但部分功能卻是有問題,這時候可透過 #tcpdump 這個指令來觀看封包 TCP Package / Frame 的狀況.
測試環境為 Ubuntu 16.04 64bits
直接使用 tcpdump 指令就可以看到所有經過該裝置的封包,但資料量太大了,封包資訊一下就過去了,建議使用參數(後面介紹).
root@ubuntu:~# tcpdump
01:12:49.391892 IP 172.16.15.1.56792 > 172.16.15.208.ssh: Flags [.], ack 4256592, win 4081, options [nop,nop,TS val 864031640 ecr 535604], length 0
01:12:49.391917 IP 172.16.15.208.ssh > 172.16.15.1.56792: Flags [P.], seq 4257056:4257448, ack 2521, win 294, options [nop,nop,TS val 535604 ecr 864031640], length 392
...
^c
1561 packets captured
18232 packets received by filter
16665 packets dropped by kernel
先來看 tcpdump 的輸出格式,如下:
Timestamp Source IP.Port > Destination IP.Port: Flags [tcp flags], seq data-seqno, ack ackno, win window, urg urgent, options [opts], length len
- hh:mm:ss.frac (Timestamp)
時間. - Source IP.Port > Destination IP.Port
來源 Source 與 目的 Destination IP + port number - Flags [tcp flags]
其中 Flags 所代表的意思為
- S(SYN) : Synchronize sequence numbers.
- F(FIN) : Last packet from sender.
- P(PSH) : Asks to push the buffered data to the receiving application.
- R(RST) : Reset the connection
- W(CWR) : Congestion Window Reduced (CWR) flag .
- E(ECE) : ECN-Echo has a dual role, depending on the value of the SYN flag. It indicates:
If the SYN flag is set (1), that the TCP peer is ECN capable.
If the SYN flag is clear (0), that a packet with Congestion Experienced flag set (ECN=11) in the IP header was received during normal transmission. - DF : Don’t fragment.
- MF : More Fragments.
- . : no flags.
- S. : SYN-ACK .
關於這些 Flags 的使用時機,可以參考 TCP/IP 常見封包 – https://benjr.tw/22371
- seq data-seqno
Data-seqno 標示該封包所包含的資料的順序號碼. - ack ackno
下一筆期待收到的資料順序號碼. - win window
關於 TCP window size 請參考 https://benjr.tw/3020 - urg urgent
- options [opts]
- MSS – Maximum segment size
- sackOK– Selective Acknowledgement
- TS val – Host’s timestamp
- ecr N – Echo reply timestamp
- nop – No-Operation??
- wscale – window scale & value
- length len
TCP 封包長度 (in Bytes) 不含標頭 headers.
當使用 tcpdump 時,在 dmesg 會有一筆關於 promiscuous mode (混雜模式)的訊息,這是讓網卡能接收所有經過它的封包,不管其目的地址是否與他有關.
root@ubuntu:~# dmesg
...
[   50.984751] device ens33 entered promiscuous mode
[   62.948837] device ens33 left promiscuous mode
-i interface
– 指定 tcpdump 所要監看的網路介面.
root@ubuntu:~# tcpdump -i ens33
-q
– Quick (quiet) 的封包輸出.封包以較少的資訊輸出.
root@ubuntu:~# tcpdump -i ens33 -q
...
01:13:33.487482 IP 172.16.15.1.56792 > 172.16.15.208.ssh: tcp 0
01:13:33.487502 IP 172.16.15.208.ssh > 172.16.15.1.56792: tcp 200
-w file
– Write the raw packets to file rather than parsing and printing them out.
-r file
– Read packets from file
有時候來不及直接看內容,建議可以儲存到檔案來觀看, -w 寫入檔案(raw packets), -r 讀取檔案
root@ubuntu:~# tcpdump -i ens33 -w tcpdump.txt
tcpdump: listening on ens33, link-type EN10MB (Ethernet), capture size 262144 bytes
^C6 packets captured
7 packets received by filter
0 packets dropped by kernel
root@ubuntu:~# tcpdump -r tcpdump.txt
reading from file tcpdump.txt, link-type EN10MB (Ethernet)
01:24:48.774307 IP 172.16.15.208.ssh > 172.16.15.1.56792: Flags [P.], seq 2365396806:2365396850, ack 3797073080, win 294, options [nop,nop,TS val 715449 ecr 864741399], length 44
....
-nn
– 使用 IP 及 port number 來顯示(預設會顯示已知的主機與服務名稱).
root@ubuntu:~# tcpdump -i ens33 -nn
01:48:15.861678 IP 172.16.15.208.22 > 172.16.15.1.56792: Flags [P.], seq 3176652:3177904, ack 1909, win 294, options [nop,nop,TS val 1067221 ecr 866140693], length 1252
沒使用時會顯示成 ssh (非 22 port)
root@ubuntu:~# tcpdump -i ens33
02:18:42.435672 IP 172.16.15.208.ssh > 172.16.15.1.56792: Flags [P.], seq 3655568:3655960, ack 2161, win 294, options [nop,nop,TS val 1523865 ecr 867961826], length 392
port
– 指定監視的埠 port , 可以是數字,也可以是服務名稱
root@ubuntu:~# tcpdump -i ens33 -nn port 22
....
02:21:01.052584 IP 172.16.15.1.56792 > 172.16.15.208.22: Flags [.], ack 11096912, win 4078, options [nop,nop,TS val 868099150 ecr 1558519], length 0
02:21:01.052605 IP 172.16.15.208.22 > 172.16.15.1.56792: Flags [P.], seq 11097420:11097632, ack 6625, win 294, options [nop,nop,TS val 1558519 ecr 868099150], length 212
02:21:01.052830 IP 172.16.15.1.56792 > 172.16.15.208.22: Flags [.], ack 11097420, win 4080, options [nop,nop,TS val 868099151 ecr 1558519], length 0
^C
57115 packets captured
57147 packets received by filter
30 packets dropped by kernel
root@ubuntu:~# tcpdump -i ens33 -nn port ssh
02:25:20.581604 IP 172.16.15.1.56792 > 172.16.15.208.ssh: Flags [.], ack 2214756, win 4083, options [nop,nop,TS val 868356938 ecr 1623401], length 0
host
– 指定監視的 host , 還可以指定 src (Source),也可以是 dst (destination)
root@ubuntu:~# tcpdump -i ens33 host 172.16.15.208
root@ubuntu:~# tcpdump -i ens33 src host 172.16.15.208
...
02:26:52.539255 IP 172.16.15.208.ssh > 172.16.15.1.56792: Flags [P.], seq 1092476:1092680, ack 613, win 294, options [nop,nop,TS val 1646391 ecr 868448203], length 204
02:26:52.539466 IP 172.16.15.208.ssh > 172.16.15.1.56792: Flags [P.], seq 1092680:1092884, ack 613, win 294, options [nop,nop,TS val 1646391 ecr 868448203], length 204
^C
5275 packets captured
5284 packets received by filter
9 packets dropped by kernel
net
– host 只能針對單一的 Host ,net 可以針對某個網域進行封包的監視.
root@ubuntu:~# tcpdump -i ens33 net 172.16
and & or
– 剛剛那些篩選條件還可以使用 and (所有條件都需要成立) 或是 or (其中一個條件成立即可)
root@ubuntu:~# tcpdump -i ens33 'port ssh and src host 172.16.15.208'
root@ubuntu:~# tcpdump -i ens33 'port ssh or src host 172.16.15.208'
-v , -vv , -vvv
– 更詳細的輸出.
root@ubuntu:~# tcpdump -i ens33 -v ip6
root@ubuntu:~# tcpdump -i ens33 -vv ip6
-A
Print each packet in ASCII.
udp
– 預設監控 TCP 也可以指定為 UDP
root@ubuntu:~# tcpdump -i ens33 udp
icmp / icmp6
– 除了 TCP / UDP 外,也可以觀察 ICMP / ICMP6 (IPv6) 的封包.
root@ubuntu:~# tcpdump icmp
root@ubuntu:~# tcpdump icmp6
ipv6
預設 ipv4 , v6 封包都會看到,可以指定只看 ipv6 所產生的封包.
root@ubuntu:~# tcpdump -i eth0 ip6
wireshark
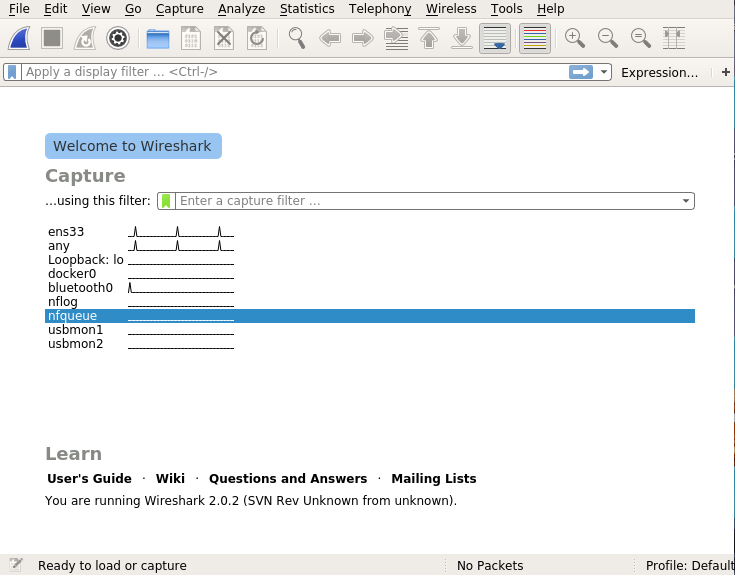
– 不習慣用文字介面,還可以選擇圖示的 wireshark
root@ubuntu:~# apt install wireshark
root@ubuntu:~# wireshark

推推 很實用的文章