![]()
必備外掛:Wordpress 防火牆 Wordfence ,安裝方式就不加以說明了,安裝完成並啟動 在 控制台 可以看到 Wordfence
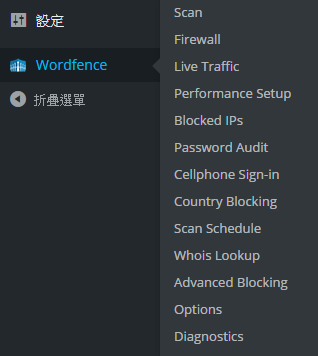
Wordfence Security 主要功能 (部分為付錢版本才能使用)
- Scan
- Firewall
- Live Traffic
- Performance Setup
- Blocked IPs
- Password Audit (only available to Premium Members)
- Cellphone Sign-in (only available to Premium Members)
- Country Blocking (only available to Premium Members)
- Sacn Schedule (only available to Premium Members)
- Whois Lookup
- Advanced Blocking (部分功能為 only available to Premium Members)
- Options
大部分免費的功能 安裝完成並啟動 後就能使用了.大概玩一下就知道是做什麼用的.這邊就不多介紹,不過 Firewall 這邊需要額外設定,來看一下 Firewall 要怎麼設定.
設定方式有兩種,一是直接選單的是選擇方式,不過可能是權限問題所以選了也沒用,我用了下面 Alternate method
To be as secure as possible, the Wordfence Web Application Firewall is designed to run via a PHP ini setting called auto_prepend_file in order to ensure it runs before any potentially vulnerable code runs.
NOTE: If you have separate WordPress installations with Wordfence installed within a subdirectory of this site, it is recommended that you perform the Firewall installation procedure on those sites before this one.
We’ve preselected your server configuration based on our tests, but if you know your web server’s configuration, please select it now.
另外一種方式即是手動來設定 Alternate method,一共有兩個步驟:
- 新增 /var/www/benjr/wordfence-waf.php
root@benjr:~# vi /var/www/benjr/wordfence-waf.php <?php // Before removing this file, please verify the PHP ini setting `auto_prepend_file` does not point to this. if (file_exists('/var/www/benjr/wp-content/plugins/wordfence/waf/bootstrap.php')) { define("WFWAF_LOG_PATH", '/var/www/benjr/wp-content/wflogs/'); include_once '/var/www/benjr/wp-content/plugins/wordfence/waf/bootstrap.php'; } ?> - 設定 auto_prepend_file
剛剛的 php 程式碼 wordfence-waf.php 需要再載入每一頁網頁前執行,所以要透過 auto_prepend_file 的方式來做.auto_prepend_file = auto_prepend_file.php (頁首的檔案)
auto_append_file = auto_append_file.php (頁尾的檔案)我這邊是來修改 .htaccess ,雖然 Wordfence 建議如下,但是有問題
auto_prepend_file = '/var/www/benjr/wordfence-waf.php'
後來是多增加了 php_value ,才成功使用.
root@benjr:~#vi /var/www/benjr/.htaccess
php_value auto_prepend_file "/var/www/benjr/wordfence-waf.php"
接下來設定 Firewall Status 有三種選項,根據官方文章說明這三種選項的差異 https://docs.wordfence.com/en/WAF?utm_source=plugin&utm_medium=pluginUI&utm_campaign=docsIcon
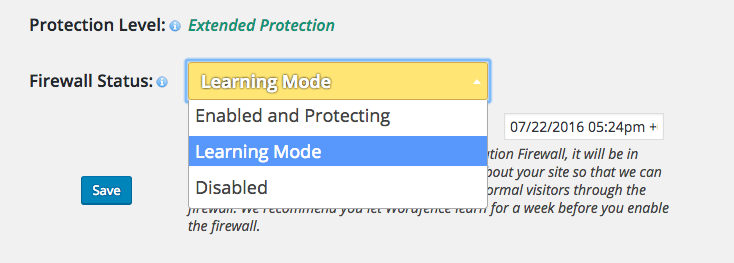
- Enabled and Protecting: In this mode, the Wordfence Web Application Firewall is actively blocking requests matching known attack patterns, and is actively protecting your site from attackers.
- Learning Mode: In this mode, the Wordfence Web Application Firewall is whitelisting any requests that would normally be blocked by the firewall. Some requests contain data that may match patterns the firewall uses to detect attacks (such as an article about SQL injection that contains SQL code). While in Learning Mode, these requests will be whitelisted, excluding them from tripping the same rules once the firewall is enabled. Use this mode to prevent false positives on your site.
- Disabled: In this mode, the Wordfence Web Application Firewall is functionally turned off and does not run any of its rules or analyze the request in any way.
系統建議先選擇 Learning Mode 讓 Wordfence 學習一周.讓它先了解您的網站,這樣它就可以了解如何保護網站,以及如何讓正常的存取通過防火牆.而且一周後系統會自動轉換(需勾選 Automatically switch to Enabled Mode on)並啟用防火牆 (Enabled and Protecting).
目前遇到設定 Google AdSense plugin 要儲存時會顯示.
“很抱歉,我們無法儲存您的設定。您網站的回應時間過長。請再試一次”
暫時關閉 Wordfence 就正常了.
目前遇到 Enabled and Protecting 開啟時, Google AdSense plugin 會無法正常顯示出廣告,關閉 Wordfence 就正常了.
相似問題的討論.
https://wordpress.org/support/topic/google-adsense-new-wordfence-firewall
好像不是 Wordfence 的問題,感覺跟 Google adsense 比較有關.