基本上就是透過 USB flash drive 安裝一個 Ubuntu Cloud 系統,接下來再透過這個 USB flash drive 去啟動系統,我們就可以開始使用 Ubuntu Cloud 了,當然也可以透過CD ,但還不確定是不是可以透過 Ubuntu Live CD 一樣從 PXE 來啟動系統,目前我們需要下列幾個步驟.
我們需要 Ubuntu Cloud 的 ISO 以及將 ISO 轉到 USB flash drive 的工具
將 Ubuntu ISO 轉到 USB flash drive
設定你的電腦並且從這 USB flash drive 啟動
設定 Ubuntu server for cloud
Ubuntu Cloud ISO
在 Ubuntu 官方網站大約有 3種 ISO 檔可以供下載.
Ubuntu Desktop
Ubuntu Server
Cloud infrastructure
其中 Cloud infrastructure 才是我們這一次要使用的其 下載點 ,目前版本為 Ubuntu Server 12.04 LTS for Cloud,下載下來後需要將這 ISO (ubuntu-12.04-cloud-live-amd64.iso)轉到 USB flash drive,不管你使用的系統是 windows , Mac OS X 還是 Linux 下都可以找到相對應的工具.
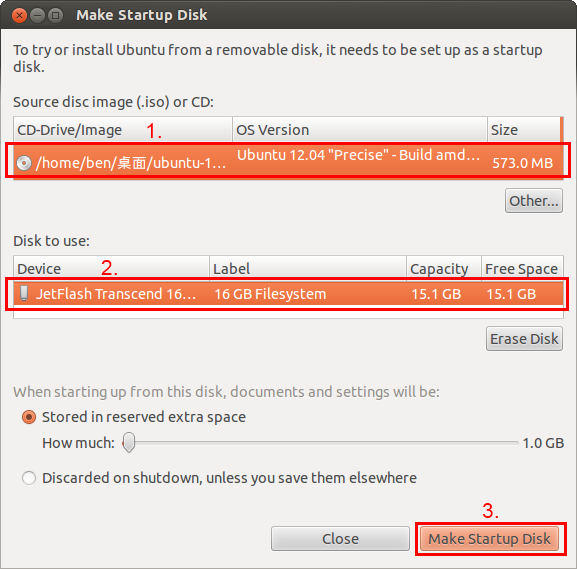
Ubuntu Cloud ISO (1) ubuntu-12.04-cloud-live-amd64.iso 檔
並確定 USB Flash Disk (2)沒選錯,如果你的 USB driver 有其他格式建議可以先 Erase Disk
Make Startup Disk (3)即可完成轉換.如 Make Startup Disk 無法執行,建議先行 Erase Disk
現在使用這usb Flash disk 開機,如果正確無誤系統會開到 ubuntu 的桌面系統.
OpenStack 環境設定
雖然環境已經有了,但還需要初始過 OpenStack 才可以使用,在安裝好的系統桌面有個說明檔 "GettingStarted.txt" ,接下來就按照說明檔內容來設定.系統提供了 Nova 環境設定檔,所以我們可以很簡易透過一邊寫好的腳本檔案來設定 MySQL data base 等資料.
先執行 nova-setup.sh
$ nova-setup.sh
nova-setup.sh 這個檔只是個 腳本 (script) 檔案所以我們可以看一下他的內容,大致可以看到是和 Mysql 相關的設定,基本上系統沒有錯誤發生時,該執行檔不會產生任何信息,等待數秒鐘的執行時間並且沒顯示任何錯誤信息,該步驟就大功告成.
$ cat /home/ubuntu/bin/nova-setup.sh
#!/bin/bash
# do initial setup for nova
#– mysql setup
MYSQL_PASS="nova"
NOVA_PASS="nova"
mysql -uroot -p$MYSQL_PASS -e "CREATE DATABASE nova;"
mysql -uroot -p$MYSQL_PASS -e "GRANT ALL PRIVILEGES ON nova.* TO 'nova'@'%' IDENTIFIED BY '$NOVA_PASS'"
mysql -uroot -p$MYSQL_PASS -e "GRANT ALL PRIVILEGES ON nova.* TO 'nova'@'localhost' IDENTIFIED BY '$NOVA_PASS'"
mysql -uroot -p$MYSQL_PASS -e "FLUSH PRIVILEGES;"

#– nova db setup
sudo nova-manage db sync
sudo nova-manage network create cloudlivenet 172.20.1.0/24 1 256

exit 0
IP setting
接下來就是 IP 的設定, Cloud infrastructure 預設安裝是有圖形介面的,所以當我們要設定網卡只能透過 NetworkManager Applet 設定,不同於 Ubuntu server 版的 Command Line NetworkManager,請自行參考不同的設定方式.
$ start-openstack.sh
Setting up Dashboard…
Setting up Keystone…
[paste_deploy]
flavor = keystone

[paste_deploy]
flavor = keystone

Starting all OpenStack services…
nova-api start/running, process 3867
nova-compute start/running, process 3899
nova-network start/running, process 3923
nova-scheduler start/running, process 3938
nova-objectstore start/running, process 3953
nova-volume start/running, process 3967
nova-cert start/running, process 3986
glance-api start/running, process 3992
glance-registry start/running, process 4001
Done!
At this point, the Openstack cloud has been deployed and should be functioning.
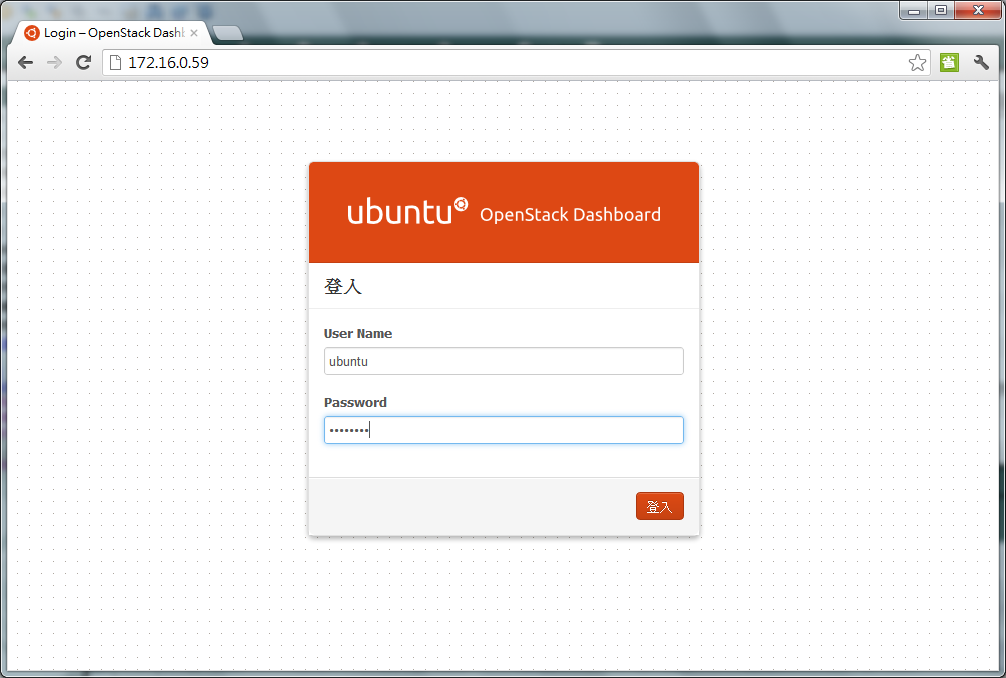
Point your browser to the public address of the openstack-dashboard node, login using admin/openstack (passwd defined in cfg above) and you can begin using the cloud, adding users, etc. Use the command "juju status openstack-dashboard" to get it's IP address.
Juju
You can also begin using Juju to deploy services into your new cloud. To generate a Juju environments.yaml entry suitable for use against the new Openstack cluster, select Settings -> Juju Environment Config -> Download Juju Environment Config in the Openstack dashboard. Note that you'll need to update the 'default-image-id' in this file to match the AMI id of an Ubuntu cloud image that you've published (eg, ami-00000002 from above).
After you've logged into the dashboard, you can add new users from the "Users" panel of the Admin toolbar. Once logged in as a new user, you can export your EC2 and Nova credentials as well as a Juju environments.yaml configuration from the 'Settings' section of the dashboard (linked from the upper-right)
Launch an instance of cirros image using the web interface. Connect to the instance using VNC (localhost:5900) or over SSH (username: 'cirros', password 'cubswin:)', IP can be seen in the web interface).
If you've uploaded Ubuntu image, use web interface to generate keypair, launch Ubuntu instance using generated key and then use SSH to connect to the instance: ssh -i name_of_the_key.pem IP_of_the_instance. Make sure you protect the key file first: chmod 600 name_of_the_key.pem.
One thought on “Ubuntu Cloud Live Image”