![]()
這邊採用的是 OpenVPN-AS(Access Server ) 為範例:
目前我在 Amazon 申請了一個一年免費的帳號,使用的 Instance 為 CentOS 5.5 32bit(在 Amazon 底下作業系統的映像檔稱為 Instance),OpenVPN 支援的作業系統包含了 RedHat ,Fedora ,CentOS ,Ubuntu 這幾種.
設定的方式我主要參考了 OpenVPN 官方的 Quick start 說明文件.安裝完成後(所需的套件也只有一個 openvpn-as),執行下列幾個步驟就可以透過 web 的方式進行設定.
OpenVPN Access Server 主要包含了一下元件:
- OpenVPN Server
- Admin Web Interface/Admin UI
- Connect Client
其實步驟也是透過下面 3步驟即可完成
OpenVPN Server
CentOS 可以透過 yum 去下載 openvpn-as ,不過我使用 yum 時卻找不到該套件,而 Ubuntu 是透過 apt-get 取得 OpenVPN-AS Package 一樣是找不到:
# sudo apt-get openvpn-as
Reading package lists... Done
Building dependency tree
Reading state information... Done
E: Unable to locate package openvpn-as
所以我們直接透過 #wget 去擷取 openvpn 官方網站所提供的 rpm 檔案.在下載前可以先去 OPENVPN 官網 查詢最新檔案名稱為何!!
# wget http://swupdate.openvpn.org/as/openvpn-as-1.8.0-CentOS5.i386.rpm
# rpm -ivh openvpn-as-1.8.0-CentOS5.i386.rpm
Preparing…                 ########################################### [100%]
    1:openvpn-as          ########################################### [100%]
The Access Server has been successfully installed in /usr/local/openvpn_as
Configuration log file has been written to /usr/local/openvpn_as/init.log
Please enter "passwd openvpn" to set the initial
administrative password, then login as "openvpn" to continue
configuration here: https://benjr.tw_IP:943/admin
To reconfigure manually, use the /usr/local/openvpn_as/bin/ovpn-init tool.
Access Server web UIs are available here:
Admin UI: https://benjr.tw_IP:943/admin
Client UI: https://benjr.tw_IP:943/
雖然系統提示 Admin UI: https://benjr.tw_IP:943/admin 以及 Client UI: https://benjr.tw_IP:943/ 使用 Port:943 ,但直接使用 Admin UI: https://benjr.tw_IP/admin 或是 Client UI: https://benjr.tw_IP/ 就可以連接上網了.
PS:要使用 https
# netstat -tlnpu |grep -i vpn
tcp 0  0 122.146.218.75:443   0.0.0.0:*  LISTEN   29553/openvpn
udp 0  0 122.146.218.75:1194  0.0.0.0:*           29573/openvpn
OPEN-VPN 之後的設定是透過 web 的方式登入,在登入時需要一組帳號與密碼,預設的帳號為 Admin 密碼則須在此時先設定:
# passwd openvpn
Enter new UNIX password:
Retype new UNIX password:
passwd: password updated successfully
Note: 安裝好的 Openvpn 使用了預設的設定值,你可以透過 web 的方式登入去修改設定資料,或是使用指令: /usr/local/openvpn_as/bin/ovpn-init 去修改.
Admin Web Interface/Admin UI
基本上剛剛就已經安裝好 OpenVPN 了,現在就只需要透過 web 設定即可,預設的管理介面網址為 https://benjr.tw_IP/admin ,注意要使用的是 https 協定,並將benjr.tw_IP 設定為你的 IP 位址,而目錄為 admin,剛剛我們還有為 openvpn 設定密碼,登入時也請使用該帳號 "openvpn",密碼就是剛剛所設定的.

登入之後,同意 "User License Agreement" 就可以針對 OpenVPN 的環境做設定了!!系統預設已經可以接受遠端 VPN 的功能,不過這邊我們還是來看看幾個比較重要的設定選項.
-
Configuring / Server Network Settings:
最主要的設定就在這裡,VPN Server 預設使用的 IP 為內部 IP,所以要讓外部的使用者可以透過 VPN 連線第一步就是將 OpenVPN Access Server 設定成為你的 Internet IP (或是 Hostname),更改設定後不要忘記 "Save Settings" 喔!!
-
Configuring / VPN Settings:
使用者透過 VPN 的設定連接到外部網路需要配至另外一組 IP 給使用者,而在 VPN Settings 設定頁面就是設定類似 Dynamic IP 位址給使用者.預設使用 "5.5.0.0/20" ,你也可以依據你的需求做設定.
-
User Management / User Permissions:
預設只有一個帳號 openvpn 他的預設權限為 "admin",但我們不想讓很多人同時使用該帳號最好的方式就是自行新增多個帳號給不同的使用者來使用.所以透過 User Permissions 頁面可以做設定.選項 "auto-login" 可以依據使用端的需求來設定. 在 "more settings" 中點選 "show" 會有更多選項可以選擇.
不過試用版的 OpenVPN 最多只能讓 2 位使用者同時上線,如果試用滿意建議可以直接上 OpenVPN 官網買 License
Connect Client
基本上 OpenVPN 安裝設定好密碼就算完成了,接下來使用者要如何使用呢!!!
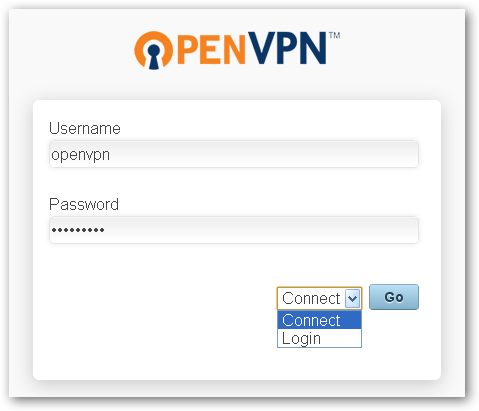
使用者第一步可以透過 web browser 連接上網,直接連上 https://benjr.tw_IP (不像剛剛管理界面,這邊不需要輸入 admin 目錄)即可做登入的動作,注意要使用的是 https 協定,並將 benjr.tw_IP 設定為你實際的 IP 位址.
使用者登入時有兩個選擇 1.Connect 2. Login ,"Connect to the VPN" 就是透過 web browser 連上 VPN Server ,而 login to the Connect Client 則是 downoad 使用者的 configuration files (client.ovpn) 或是直接下載 OpenVPN 的連線工具,下次使用者不用開網頁就可以直接連上 VPN Server:
當連線成功後透過 ipconfig 可就可以看到 VPN Srever 所指派的 IP 了.
C:\Documents and Settings\Administrator>ipconfig
Ethernet adapter 區域連線 5:
     Connection-specific DNS Suffix . :
     IP Address. . . . . . . . . . . . : 5.5.0.3
     Subnet Mask . . . . . . . . . . . : 255.255.248.0
     Default Gateway . . . . . . . . . : 5.5.0.1
這些都是初級的設定,關於其他細項設定請參考 OpenVPN 的官方網頁說明: http://openvpn.net/index.php/access-server/docs.html
HTTP proxy
很可惜的是如果你公司用的是 Proxy 方式去做連線,OpenVPN-as 是無法連線的需要透過 OpenVPN 的版本才能使用,請參考 OpenVPN 的設定方式
ovpn-init
如果想要重新設定 OpenVPN 可以透過指令: /usr/local/openvpn_as/bin/ovpn-init 重新設定,第一步就是要詢問是否同意使用版權只有選擇 yes 才會接下的步驟.
[root@benjr ~]# /usr/local/openvpn_as/bin/ovpn-init
Detected an existing OpenVPN-AS configuration.
Continuing will delete this configuration and restart from scratch.
Please enter 'DELETE' to delete existing configuration: DELETE
Stopping openvpnas daemon…
OpenVPN Access Server
Initial Configuration Tool
——————————————————
OpenVPN Access Server End User License Agreement (OpenVPN-AS EULA)

1. Copyright Notice: OpenVPN Access Server License;
Copyright (c) 2009-2011 OpenVPN Technologies, Inc.. All rights reserved.
"OpenVPN" is a trademark of OpenVPN Technologies, Inc.
2. Redistribution of OpenVPN Access Server binary forms and documents,
are permitted provided that redistributions of OpenVPN Access Server
binary forms and documents must reproduce the above copyright notice.
3. You agree not to reverse engineer, decompile, disassemble, modify, translate,
make any attempt to discover the source code of this software, or create
derivative works from this software.
4. The OpenVPN Access Server is bundled with other open source software
components, some of which fall under different licenses. By using
OpenVPN or any of the bundled components, you agree to be bound by
the conditions of the license for each respective component.
See /usr/local/openvpn_as/license.txt in the Access Server distribution
for more info.
5. THIS SOFTWARE IS PROVIDED "AS IS" AND ANY EXPRESSED OR IMPLIED WARRANTIES,
INCLUDING, BUT NOT LIMITED TO, THE IMPLIED WARRANTIES OF MERCHANTABILITY
AND FITNESS FOR A PARTICULAR PURPOSE ARE DISCLAIMED. IN NO EVENT SHALL
OPENVPN TECHNOLOGIES, INC BE LIABLE FOR ANY DIRECT, INDIRECT, INCIDENTAL,
SPECIAL, EXEMPLARY, OR CONSEQUENTIAL DAMAGES (INCLUDING, BUT NOT LIMITED
TO, PROCUREMENT OF SUBSTITUTE GOODS OR SERVICES; LOSS OF USE, DATA, OR
PROFITS; OR BUSINESS INTERRUPTION) HOWEVER CAUSED AND ON ANY THEORY OF
LIABILITY, WHETHER IN CONTRACT, STRICT LIABILITY, OR TORT (INCLUDING
NEGLIGENCE OR OTHERWISE) ARISING IN ANY WAY OUT OF THE USE OF THIS
SOFTWARE, EVEN IF ADVISED OF THE POSSIBILITY OF SUCH DAMAGE.

Please enter 'yes' to indicate your agreement [no]: yes
這邊我不太懂他的 backup 或是 standby 模式所代表意涵,我就直接使用他的預設值 yes 讓我們可以透過 web 的上進行 openvpn 的管理.
Once you provide a few initial configuration settings,
OpenVPN Access Server can be configured by accessing
its Admin Web UI using your Web browser.
Will this be the primary Access Server node?
(enter 'no' to configure as a backup or standby node)
> Press ENTER for default [yes]:
因為我對外的 IP 是122.146.218.100 ,我通常都是從遠端進行管理,所以只開放該 IP 即可.
Please specify the network interface and IP address to be
used by the Admin Web UI:
(1) all interfaces: 0.0.0.0
(2) eth0: 122.146.218.100
Please enter the option number from the list above (1-2).
> Press Enter for default [2]:
openvpn 管理預設 UDP port 為 943 ,我也是採用預設值.
Please specify the port number for the Admin Web UI.
> Press ENTER for default [943]:
openvpn 管理預設 TCP port 為 443,因為 https 同樣採用 port 所以我也採用預設值
Please specify the TCP port number for the OpenVPN Daemon
> Press ENTER for default [443]:
可以將 VPN 收到的封包可以進行轉送,如果我們需要透過 VPN 來上網,那就一定要選擇 yes(預設值)
Should client traffic be routed by default through the VPN?
> Press ENTER for default [yes]:
DNS 是否可以透過來 VPN 轉送
Should client DNS traffic be routed by default through the VPN?
> Press ENTER for default [yes]:
不清楚,我直接使用預設值
Use local authentication via internal DB?
> Press ENTER for default [no]:
不清楚,我直接使用預設值
Should private subnets be accessible to clients by default?
> Press ENTER for default [yes]:
預設的管理者皆為 openvpn 你可以依據自己的需要做修改.
To initially login to the Admin Web UI, you must use a
username and password that successfully authenticates you
with the host UNIX system (you can later modify the settings
so that RADIUS or LDAP is used for authentication instead).
You can login to the Admin Web UI as "openvpn" or specify
a different user account to use for this purpose.

Do you wish to login to the Admin UI as "openvpn"?
> Press ENTER for default [yes]:
預設 License 只能至多允許 2 個連線,這邊就不輸入任何序號就先試試看之後再決定是不是要多買 License.
> Please specify your OpenVPN-AS license key (or leave blank to specify later):
Initializing OpenVPN…
Adding new user login…
useradd -s /sbin/nologin "openvpn"
Writing as configuration file…
Perform sa init…
Wiping any previous userdb…
Creating default profile…
Modifying default profile…
Adding new user to userdb…
Modifying new user as superuser in userdb…
Getting hostname…
Hostname: localhost.localdomain
Preparing web certificates…
Getting web user account…
Adding web group account…
Adding web group…
Adjusting license directory ownership…
Initializing confdb…
Generating init scripts…
Generating PAM config…
Generating init scripts auto command…
Starting openvpnas…

NOTE: Your system clock must be correct for OpenVPN Access Server
to perform correctly. Please ensure that your time and date
are correct on this system.

Initial Configuration Complete!
You can now continue configuring OpenVPN Access Server by
directing your Web browser to this URL:

https://122.146.218.100:943/admin
Login as "openvpn" with the same password used to authenticate
to this UNIX host.

During normal operation, OpenVPN AS can be accessed via these URLs:
Admin UI: https://122.146.218.100:943/admin
Client UI: https://122.146.218.100:943/

See the Release Notes for this release at:
http://www.openvpn.net/access-server/rn/openvpn_as_1_8_4.html
管理界面: https://122.146.218.100:943/admin 雖然使用 943 其實直接使用也可
一般使用者連線: https://122.146.218.100:943/
雖然使用 943 其實直接使用也可
管理界面: https://122.146.218.100:943/admin
一般使用者連線: https://122.146.218.100
當然你也可以不用像我這麼辛苦自己架設 VPN 外.你還可以找一些商用的 VPN 如: go-vpn 付點費用就可以使用了.
6 thoughts on “OpenVPN-Access Server”