![]()
前面採用了手動的設定方式
- Install / Connect – https://benjr.tw/626
- All Devices (Hosts, Routers,…) – https://benjr.tw/4733
- All Stream Blocks – https://benjr.tw/5351
- All Traffic Generators – https://benjr.tw/5408
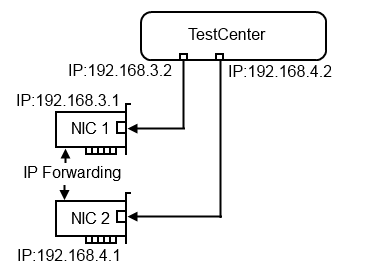
TestCenter 所需的網路埠也一樣是兩個而實際的連接圖如下:
IP Forwarding
這兩個網路埠必須同屬一台 Server 上,為了讓這兩個埠相通,在 Linux 下必須開啟 IP Forwarding 的功能.要讓 IP Forwarding 生效最快的方式就是直接更改 /proc/sys/net/ipv4/ip_forward 的值,但這方式在下次開機後會失效.
[root@benjr ~]# echo 1 > /proc/sys/net/ipv4/ip_forward
還是要更改設定檔,這樣下次開機一樣有效,並使用指令 sysctl -p 讓他立即生效.
[root@benjr ~]# vi /etc/sysctl.conf
net.ipv4.ip_forward = 1
[root@benjr ~]# sysctl –p
這一次的效能測試主要是透過 TCP/IP Layer 3 的方式去測試,所以需要將剛剛那兩個埠設定固定 IP 並將他們啟動.
[root@benjr ~]# ifconfig eth0 192.168.3.1
[root@benjr ~]# ifconfig eth1 192.168.4.1
Select Wizard
TestCenter 有提供 Wizards 的測試方式,我們來試試看 RFC2544 網路效能檢測的方式,在 Tool bar 左上方有一個 Wizards 的選項.
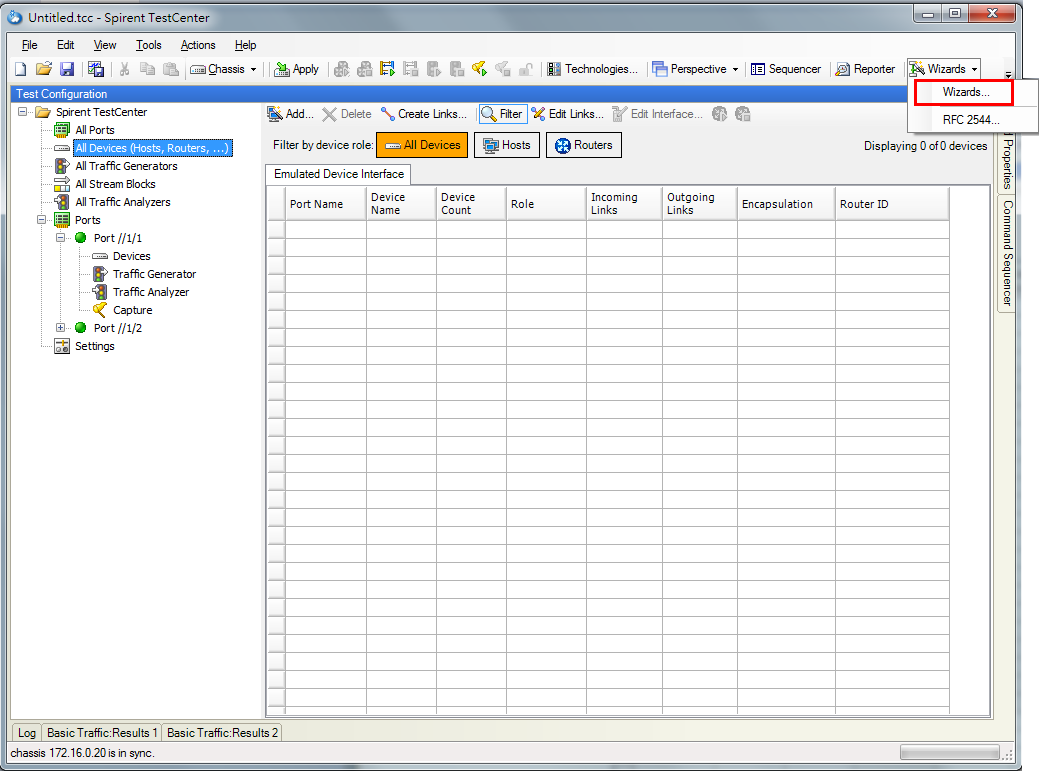
選擇這次要測試的項目 Benchmarking RFC2544 – http://tools.ietf.org/html/rfc2544
Note:
This document discusses and defines a number of tests that may be used to describe the performance characteristics of a network interconnecting device.
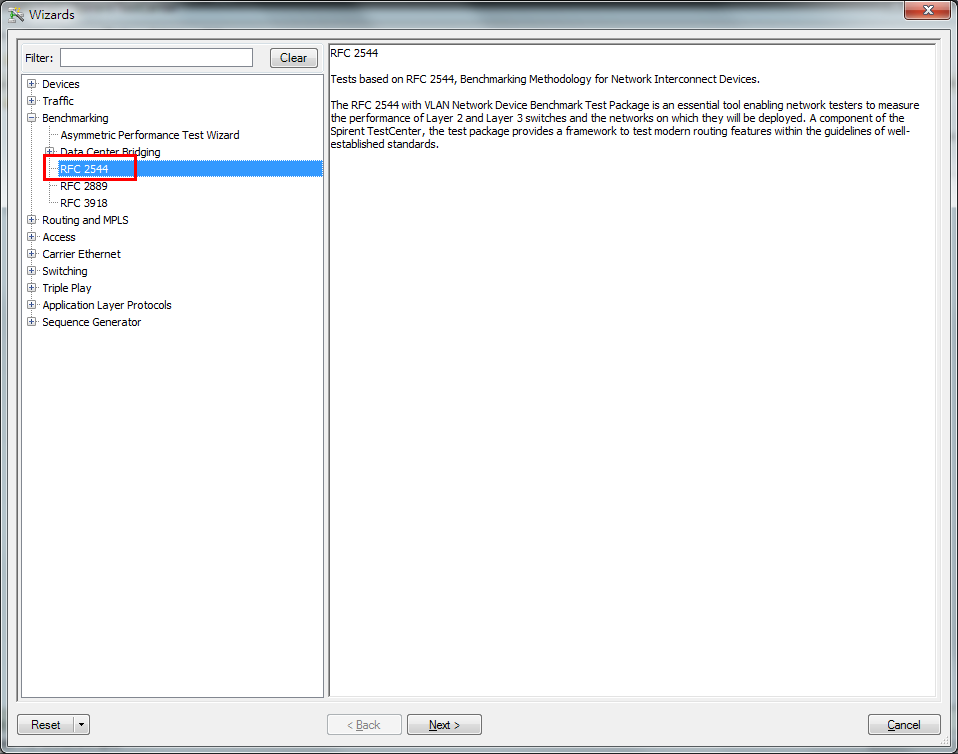
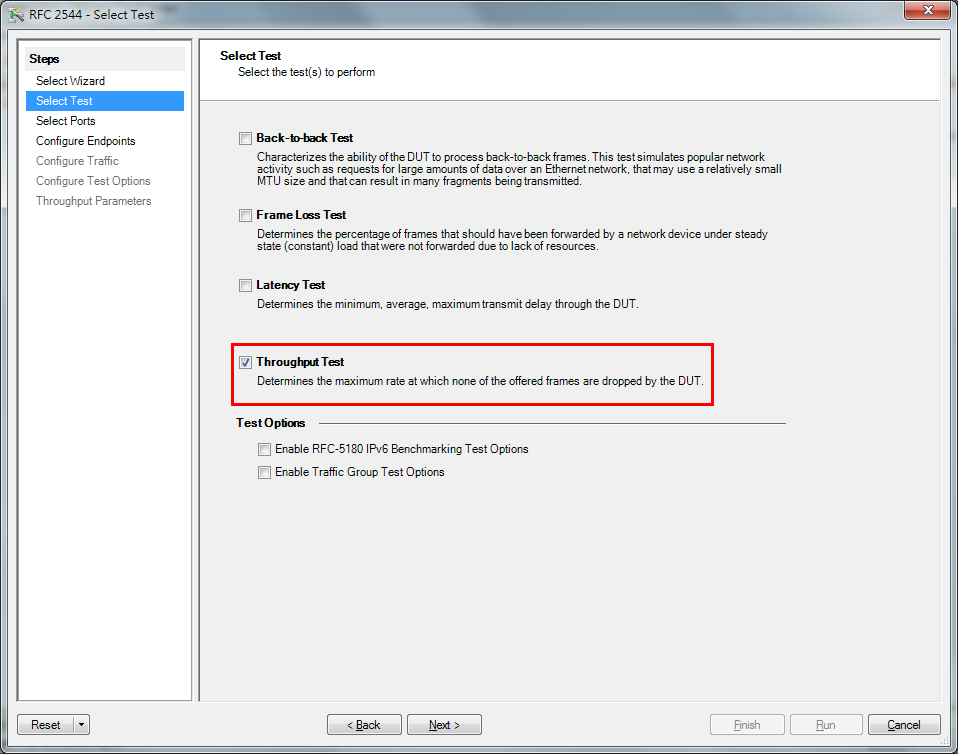
Select Test
RFC2544 有
- Back-to-Back Test
- Frame Loss Test
- Latency Test
- Throughput Test
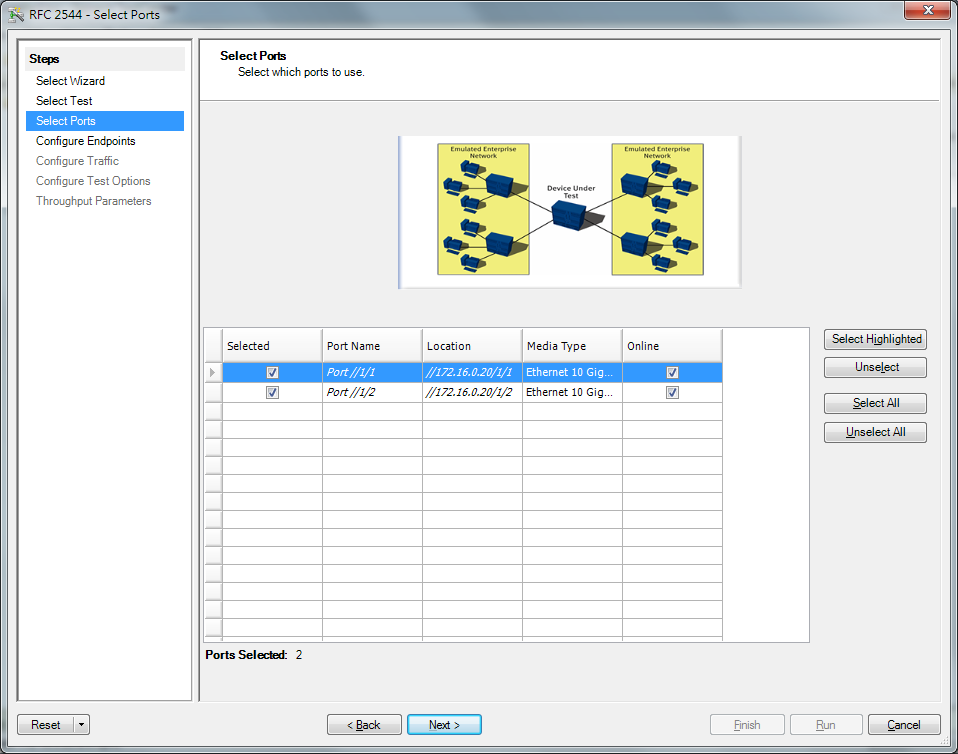
Select Ports
我的 TestCenter 模組也只有兩個,所以全部選擇.按下一步 Next 繼續
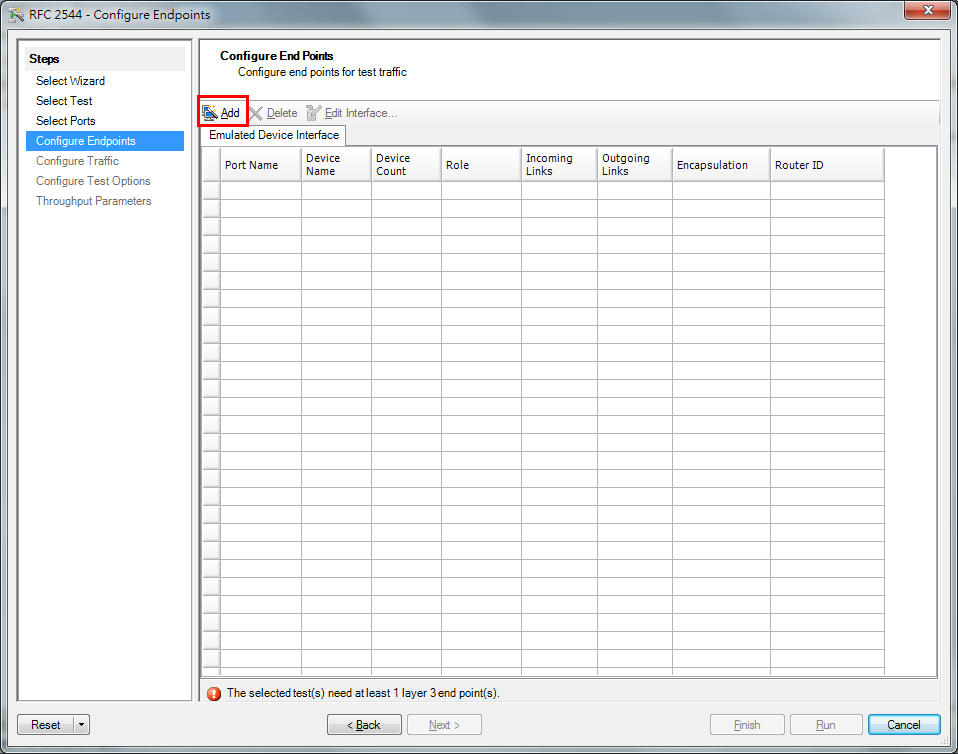
Configure Endpoint
按 Add 新增裝置,按 Add 新增設定大概需要以列幾步驟:
- Select Ports
我的 TestCenter 模組也只有兩個,所以全部選擇.Show Port Type 就選擇 Ethernet .除非你要測試其它模式才選擇 POS/SDH , ATM , FC按下一步 Next 繼續 - Select Protocols
- Select Encapsulation
- Configure Devices
- Preview
我都是使用預設值,也可以直接按 Finish 之後再設定即可.
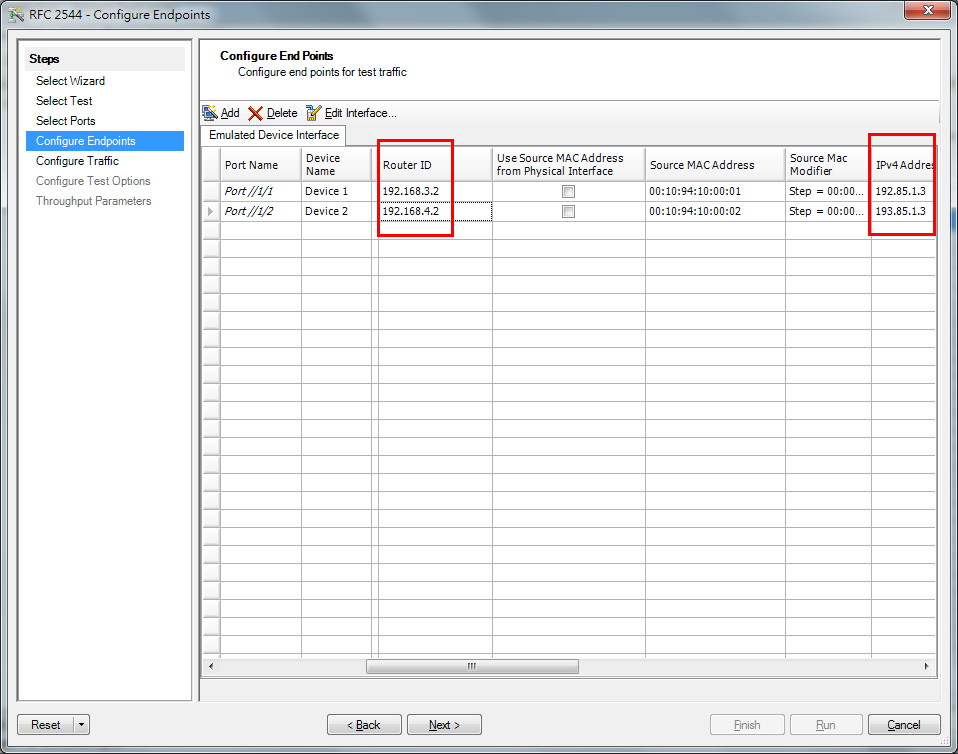
IPv4 Address
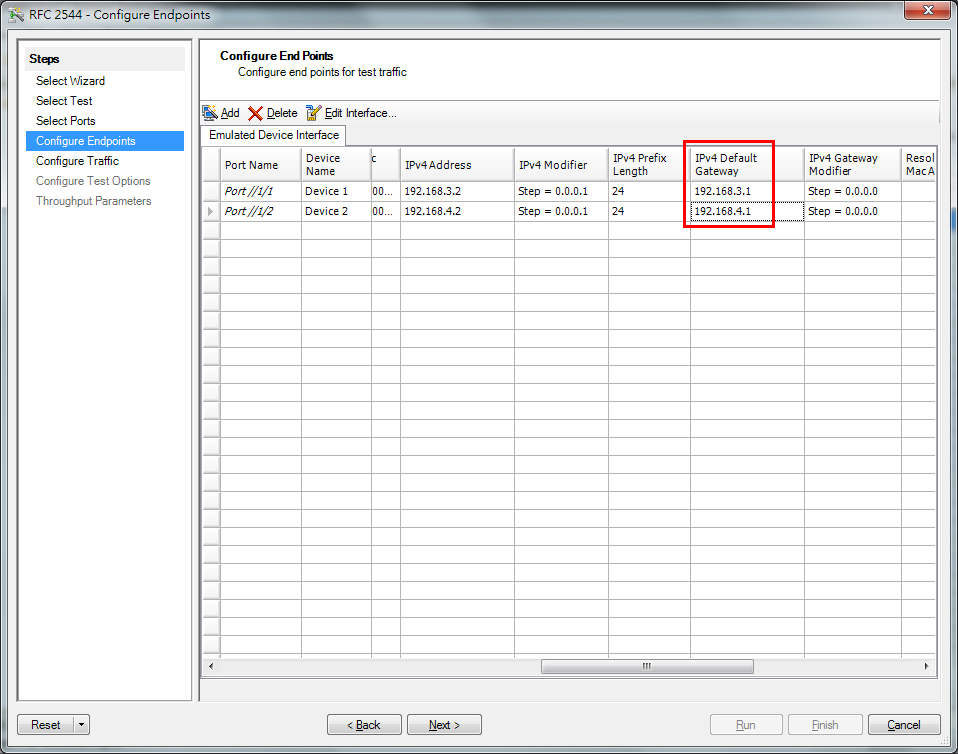
IPv4 Default Gateway
IP 請參考前面的實際的連接圖
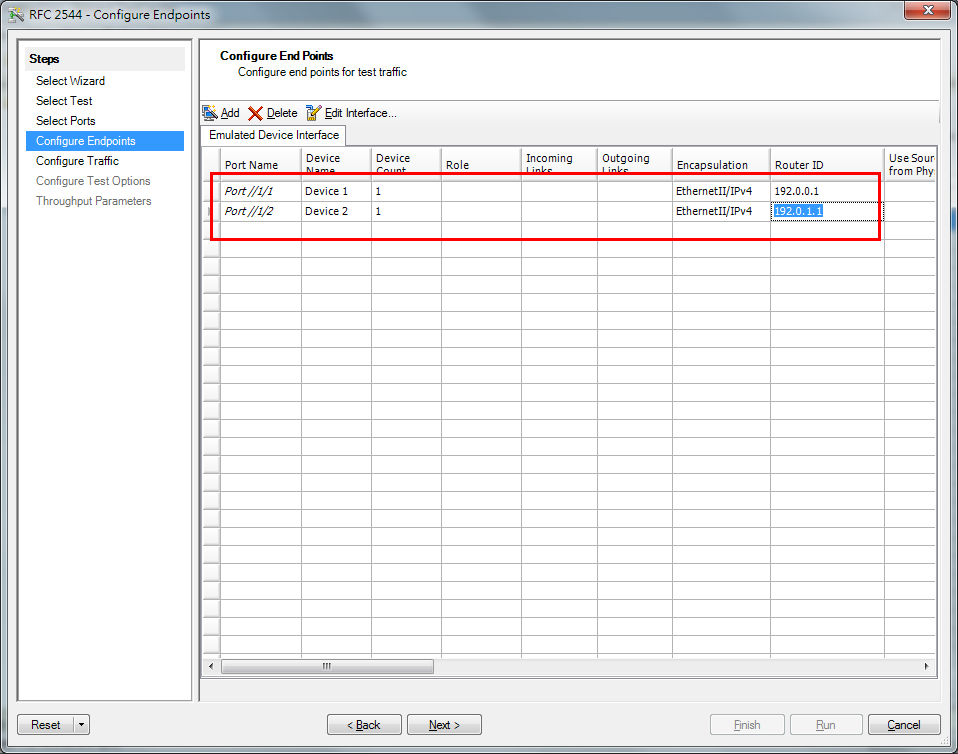
IPv4 Address
Port//1/1 – 192.168.3.2
Port//1/2 – 192.168.4.2
IPv4 Default Gateway
Port//1/1 – 192.168.3.1
Port//1/2 – 192.168.4.1
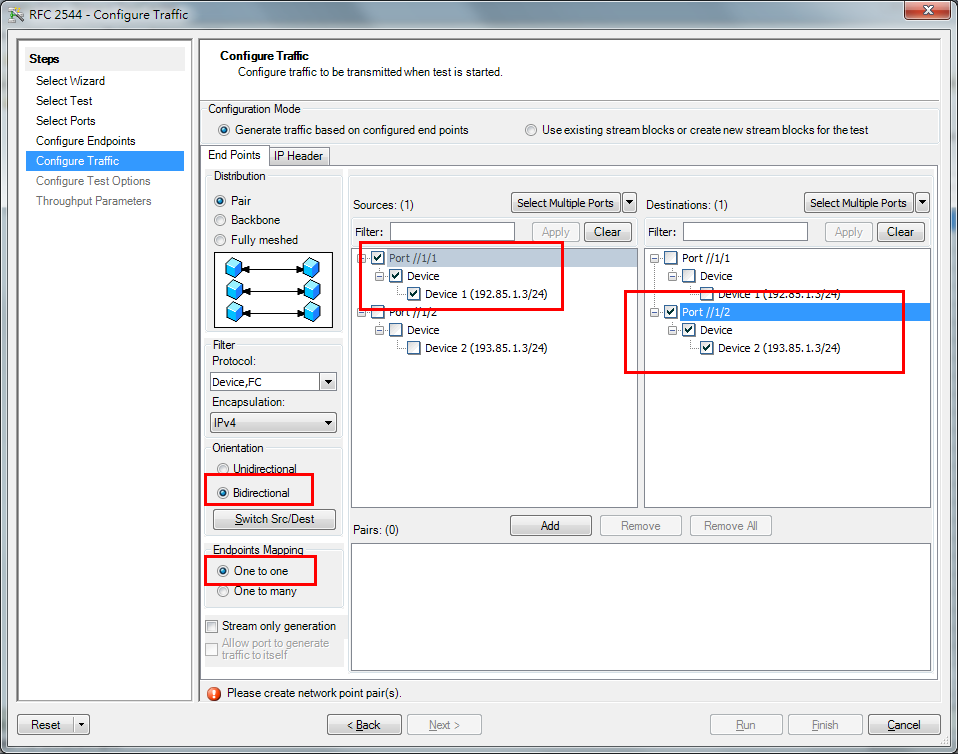
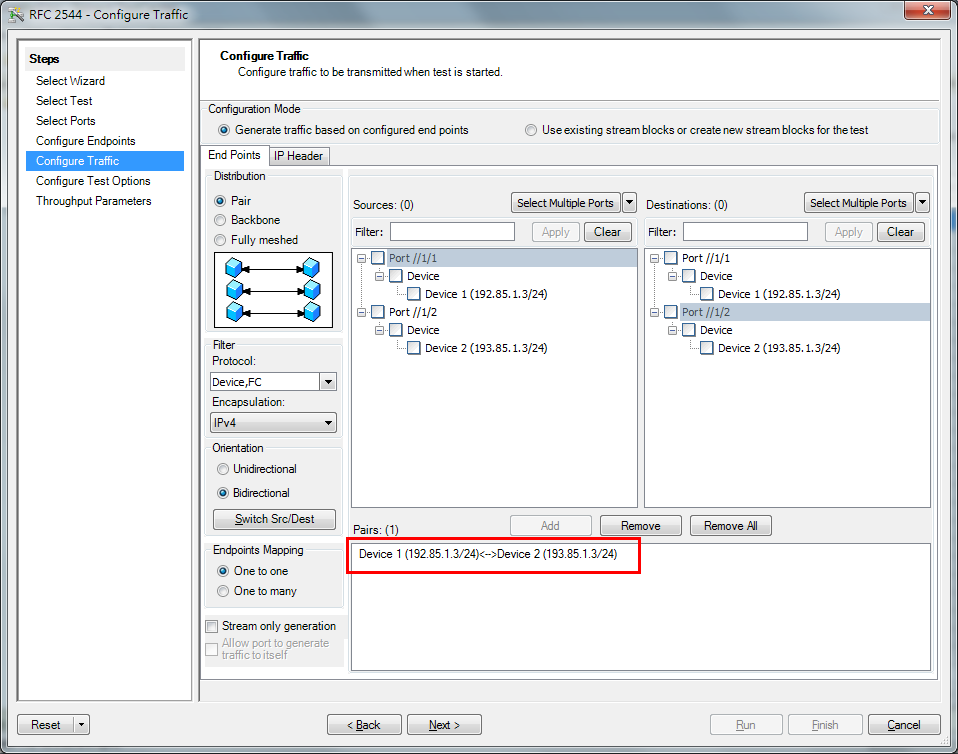
Configure Traffic
Configure Traffic 也就是決定封包流量的方向.依據之前的連接圖,我採用的是 Port //2/1, Port //2/2 互打,因為 Ethernet 是雙向的,所以建議打雙向的方式
所以在 Source and Destination ,Source 選擇 Port //2/1, Destination 選擇 Port //2/2,打雙向所以在 Orientation 選擇 Bidirectional, Endpoints Mapping 選擇 One-to-One(我只有兩個埠) ,最後按新增 Add 即可.
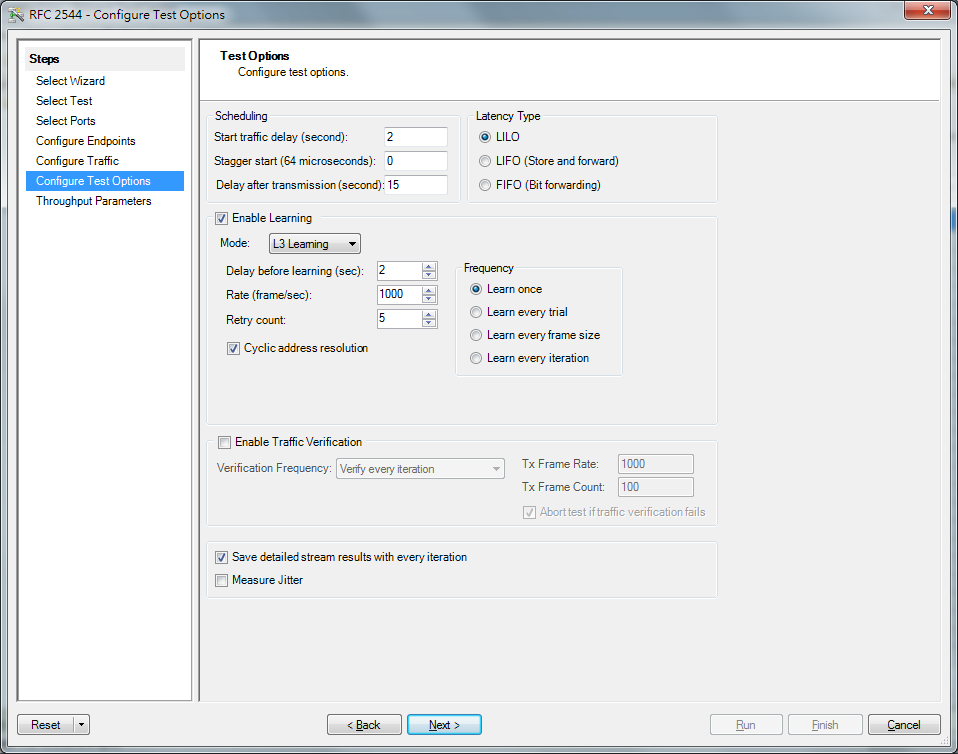
Configure Test Options
Configure Test Options,我沒特別改設定值.
Throughput Parameters
Trial Duration 設定為 60s(秒)
Frame Size (bytres) 設定為 Custom 多種封包 從 64,128,256,512,1024,1280,1518 等不同的封包.

frame 大小為 64bytes ~ 1518bytes(依據 data 大小來決定大小),標準訊框最大可以為 1518 bytes – 4bytes (FCS:frame check sequence).這 data 大小定義是在10幾年前了,到目前網路環境已經從 10/100M 到 1G/10 G 的環境下,這樣的資料大小實在不符合效益.因為資料最大只能裝 1500 bytes.如果一筆 9000 bytes 大小的資料需要封裝成 6 個 frame.這樣就浪費了 18(frame 大小不包括 data) * 5(需多封裝 5 個 frame) = 90 bytes 的資料.時間長久下來資料就會浪費更多.也因此 Jumbo frame 出現了!!它的資料最大可以到 9000 bytes ,還有一種 Super jumbo frames 可支援到 64000 bytes.雖然 Jumbo frame 可以讓網路效能提昇但
是問題來了,並不是每一個 switch 或是網卡都支援 Jumbo frame.所以到頭來 frame 還是會被切割成較小的 frame.至於你要看 switch 或是網卡有沒有支援 Jumbo
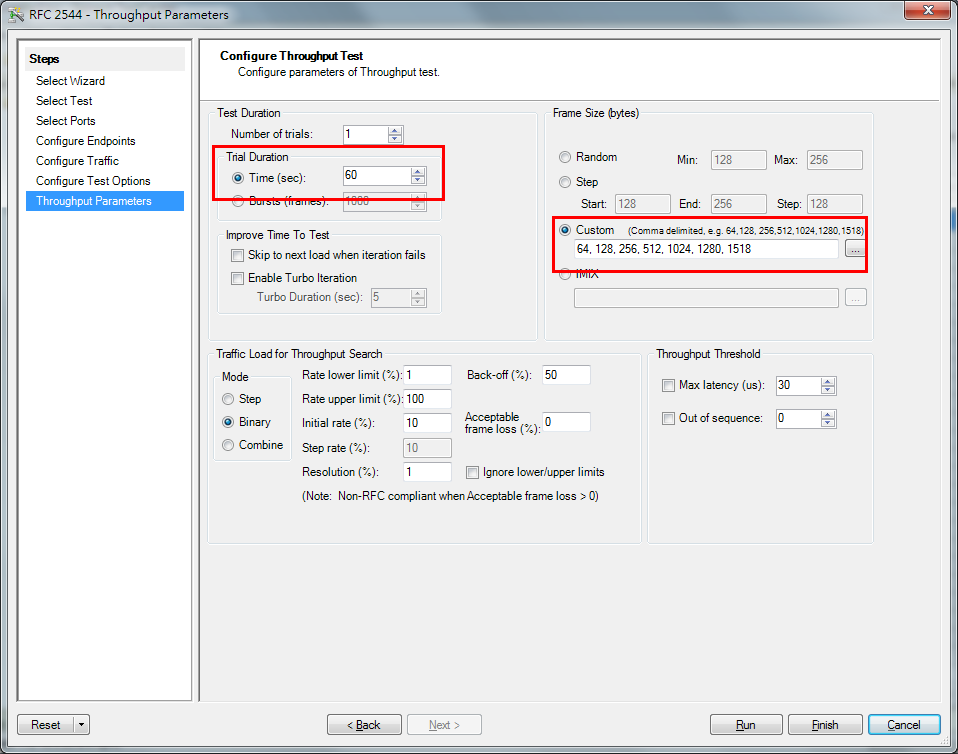
按 Finish 即完成設定.或是 Run 開始執行.
測試報告
下面是 10G NIC TestCenter 的部分測試結果,你可以看到一開始 offered Load 為 10 , Min Frame Loss 的掉包率為 0 ,所以系統加重 Offered Load 至 55% 發現會掉包,所以 Offered Load 降至 32.5,發現不會掉包,所以在 55 跟 32.5 中間娶個中間值 43.75 再測試.依序最後得到的值是 40.219,這個 10G Ethernet 的能力只到如此(算是很差).
| Frame Size (bytes) | Intended Load (%) | Offered Load (%) | Min Frame Loss (%) | Min Latency (uSec) | Avg Latency (uSec) | Max Latency (uSec) |
| 1518 | 10 | 10 | 0 | 0 | 65.611 | 151.28 |
| 1518 | 55 | 54.977 | 24.03 | 0 | 2314.382 | 3371.16 |
| 1518 | 32.5 | 32.493 | 0 | 0 | 52.215 | 150.96 |
| 1518 | 43.75 | 43.742 | 5.13 | 0 | 2311.332 | 3382.53 |
| 1518 | 38.125 | 38.106 | 0 | 0 | 48.89 | 174.53 |
| 1518 | 40.938 | 40.906 | 0.039 | 0 | 197.629 | 3005.87 |
| 1518 | 39.531 | 39.516 | 0 | 0 | 48.113 | 170.82 |
| 1518 | 40.234 | 40.219 | 0 | 0 | 47.883 | 181.86 |
One thought on “TestCenter – Wizards 效能測試 (RFC2544)”