![]()
在使用 WinPE PXE (Linux PXEBoot – https://benjr.tw/917 , Windows RIS / WDS – https://benjr.tw/279 , WDS – https://benjr.tw/100848 )安裝 Windows 時會搭配不同的 unattend.xml (Answer file) 來自動安裝.
測試環境為 Windows 10 x86_64 (虛擬機)
unattend.xml 可以在安裝時來指定,指令如下 (指令可以寫在 startnet.cmd 內)
setup /unattend:unattend.xml
那 startnet.cmd 在哪裡?先來簡單看一下 WinPE 的架構.
WinPE
須先安裝 Windows ADK (Assessment and Deployment Kit) 可以在 https://docs.microsoft.com/zh-tw/windows-hardware/get-started/adk-install#winADK 找到,裡面包含了 WinPE 的相關環境與指令,詳細關於 ADK 請參考 – https://benjr.tw/170
先透過指令 copype 建立一個 WinPE 工作環境 (平台可以選擇 x86 , amd64 , arm , arm64, 路徑 c:\WinPE 自訂),在程式集 Windows kits 點選 Deployment and Imaging Tools Environment.
C:\Program Files (x86)\Windows Kits\10\Assessment and Deployment Kit\Deployment Tools>copype amd64 c:\WinPE
先從 WinPE 檔案開始,新產生好的 WinPE 目錄如下,
- fwfiles 資料夾
- media 內含 media\sources 下的檔案 boot.wim 就是 winPE 最基礎的檔案.
- mount 為空資料夾,主要是將 WinPE 映像檔掛載時用的.
如果要修改 boot.wim 內容需要透過指令 DISM (Deployment Image Servicing and Management) – 指令需要有 administrator 權限,可以透過 command prompt (run as adminstrator).把 Windows images 映像檔 boot.wim 掛載起來.
掛載
C:\Windows\system32>Dism /Mount-Image /ImageFile:"C:\WinPE\media\sources\boot.wim" /index:1 /MountDir:"C:\WinPE\mount"
Deployment Image Servicing and Management tool
Version: 6.3.9600.16384

Mounting image
[==========================100.0%==========================]
The operation completed successfully.
startnet.cmd 就在 %SYSTEMROOT%\System32 ,預設內容只有 wpeinit
C:\Windows\system32>type C:\WinPE\mount\Windows\System32\startnet.cmd
wpeinit
答案出來了 WinPE ISO -> \media\sources\boot.wim -> \Windows\System32\startnet.cmd
wpeinit
在 startnet.cmd 裡面的指令 wpeinit 是做什麼的?
微軟官網寫 Wpeinit.exe 將安裝即插即用設備,處理 Unattend.xml 並加載網路資源.
startnet.cmd
為了讓 WinPE 自動安裝 Windows 作業系統,需要在 startnet.cmd 編寫以下的內容,為最基本的 Bat 批次檔.
C:\Windows\system32>type C:\WinPE\mount\Windows\System32\startnet.cmd
wpeinit
net use z: \\SERVER\SHARE /user:SERVER\USER PASSWORD
z:
cd windows
setup /unattend:unattend.xml
卸載
修改,新增好之後依樣是透過 Dism 卸載,boot.wim 就已經修改好可以直接使用.
C:\Windows\system32>Dism /Unmount-Image /MountDir:"C:\WinPE\mount" /commit
Deployment Image Servicing and Management tool
Version: 6.3.9600.16384

Saving image
[==========================100.0%==========================]
Unmounting image
[==========================100.0%==========================]
The operation completed successfully.
正式拿到 PXE 測試前,可以先做成 ISO 透過虛擬機來試試.
建立 WinPE iso 檔 (在程式集 Windows kits 點選 Deployment and Imaging Tools Environment .)
C:\Program Files (x86)\Windows Kits\10\Assessment and Deployment Kit\Deployment Tools>MakeWinPEMedia /iso C:\WinPE c:\WinPE\WinPE_x86.iso
Creating c:\WinPE\WinPE_x86.iso...

100% complete

Success
unattend.xml
RedHat / CentOS 安裝完成之後在 root 資料夾會留下當初安裝的設定檔 anaconda-ks.cfg (自動安裝設定檔 kickstart),雖然是文字檔但編輯起來還是很累人的. RedHat 提供了一隻工具 (#system-config-kickstart) 可以讓我們透過勾選選單的方式來設定安裝時的設定值.
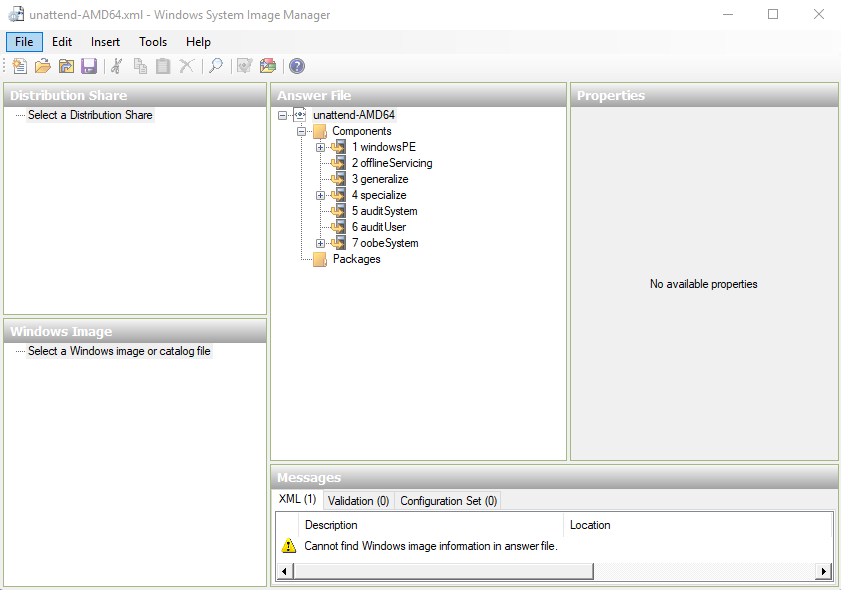
Windows 的 unattend.xml 就如同 Linux 的 kickstart , unattend.xml 雖然可以用文字編輯來編輯,不過還是建議使用 Windows System Image Manager (Windows SIM).
在程式集 Windows kits 點選 Windows System Image Manager.

xml 格式以及設定請參考 – https://docs.microsoft.com/en-us/windows-hardware/customize/desktop/unattend/microsoft-windows-setup