![]()
工作平台為 CentOS 7.2 最小安裝. Nginx (音同 Engine X ,Web ,HTTP 伺服器)
YUM 預設並沒有 Nginx (Web server),所以我們需要手動的新增 Nginx 的 Repo 檔 ,手動編寫 /etc/yum.repos.d/nginx.repo 或是直接安裝 nginx 提供的 Repo 設定套件.
[root@localhost ~]# yum install nginx
Loaded plugins: fastestmirror
Loading mirror speeds from cached hostfile
 * base: centos.cs.nctu.edu.tw
 * extras: centos.cs.nctu.edu.tw
 * updates: centos.cs.nctu.edu.tw
No package nginx available.
Error: Nothing to do
[root@localhost ~]# rpm -Uvh http://nginx.org/packages/centos/7/noarch/RPMS/nginx-release-centos-7-0.el7.ngx.noarch.rpm
這樣就會在 /etc/yum.repos.d/ 目錄產生 nginx.repo 檔案
[root@localhost ~]# cat /etc/yum.repos.d/nginx.repo
# nginx.repo

[nginx]
name=nginx repo
baseurl=http://nginx.org/packages/centos/7/$basearch/
gpgcheck=0
enabled=1
接下來就可以安裝 nginx 了.
[root@localhost ~]# yum install nginx
這樣就結束了,確認一下 nginx 是否開啟 #systemctl start , 開機是否啟動 #systemctl enable
[root@localhost ~]# systemctl start nginx.service
[root@localhost ~]# systemctl status nginx
● nginx.service - nginx - high performance web server
   Loaded: loaded (/usr/lib/systemd/system/nginx.service; disabled; vendor preset: disabled)
   Active: active (running) since 四 2016-10-13 19:12:28 CST; 1s ago
     Docs: http://nginx.org/en/docs/
  Process: 28770 ExecStart=/usr/sbin/nginx -c /etc/nginx/nginx.conf (code=exited, status=0/SUCCESS)
  Process: 28768 ExecStartPre=/usr/sbin/nginx -t -c /etc/nginx/nginx.conf (code=exited, status=0/SUCCESS)
 Main PID: 28772 (nginx)
   CGroup: /system.slice/nginx.service
           ├─28772 nginx: master process /usr/sbin/nginx -c /etc/nginx/nginx....
           └─28773 nginx: worker process
確認 nginx.service; 狀態為 enabled
[root@localhost ~]# systemctl enable nginx.service
Created symlink from /etc/systemd/system/multi-user.target.wants/nginx.service to /usr/lib/systemd/system/nginx.service.
[root@localhost ~]# systemctl status nginx
● nginx.service - nginx - high performance web server
   Loaded: loaded (/usr/lib/systemd/system/nginx.service; enabled; vendor preset: disabled)
   Active: active (running) since 四 2016-10-13 20:56:05 CST; 28s ago
     Docs: http://nginx.org/en/docs/
 Main PID: 16905 (nginx)
   CGroup: /system.slice/nginx.service
           ├─16905 nginx: master process /usr/sbin/nginx -c /etc/nginx/nginx.conf
           └─16906 nginx: worker process
[root@localhost html]# netstat -ant | grep :80
tcp        0      0 0.0.0.0:80              0.0.0.0:*               LISTEN
透過瀏覽器來檢查一下,如果可以看到如下的畫面即代表 nginx 服務已經正常啟動.
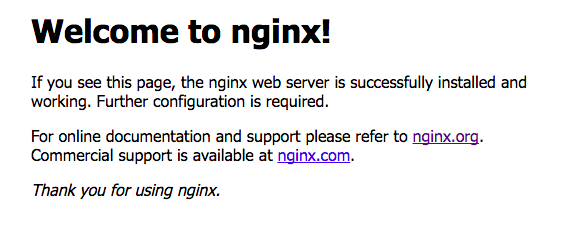
nginx 的設定檔 /etc/nginx/nginx.conf 與 /etc/nginx/conf.d/default.conf ,這邊有定義了他的 http Root (網站內容的根目錄) 為 /usr/share/nginx/html (與 Apache 的 Document Root – /var/www/html 不相同) , 預設已經有 index.html (就是剛剛看到的 HTML)
[root@localhost html]# cat /etc/nginx/conf.d/default.conf
server {
    listen       80;
    server_name  localhost;

    #charset koi8-r;
    #access_log  /var/log/nginx/log/host.access.log  main;

    location / {
        root   /usr/share/nginx/html;
        index  index.html index.htm;
    }

    #error_page  404              /404.html;

    # redirect server error pages to the static page /50x.html
    #
    error_page   500 502 503 504  /50x.html;
    location = /50x.html {
        root   /usr/share/nginx/html;
    }

    # proxy the PHP scripts to Apache listening on 127.0.0.1:80
    #
    #location ~ \.php$ {
    #    proxy_pass   http://127.0.0.1;
    #}

    # pass the PHP scripts to FastCGI server listening on 127.0.0.1:9000
    #
    #location ~ \.php$ {
    #    root           html;
    #    fastcgi_pass   127.0.0.1:9000;
    #    fastcgi_index  index.php;
    #    fastcgi_param  SCRIPT_FILENAME  /scripts$fastcgi_script_name;
    #    include        fastcgi_params;
    #}

    # deny access to .htaccess files, if Apache's document root
    # concurs with nginx's one
    #
    #location ~ /\.ht {
    #    deny  all;
    #}
}
<!DOCTYPE html>
<html>
<head>
<title>Welcome to nginx!</title>
<style>
    body {
        width: 35em;
        margin: 0 auto;
        font-family: Tahoma, Verdana, Arial, sans-serif;
    }
</style>
</head>
<body>
<h1>Welcome to nginx!</h1>
<p>If you see this page, the nginx web server is successfully installed and
working. Further configuration is required.</p>

<p>For online documentation and support please refer to
<a href="http://nginx.org/">nginx.org</a>.<br/>
Commercial support is available at
<a href="http://nginx.com/">nginx.com</a>.</p>

<p><em>Thank you for using nginx.</em></p>
</body>
</html>
不過現在 nginx 還不認識 PHP ,這時候開啟關於 PHP 檔案 Nginx 會把它當作一般檔案來下載,我們還需要設定 PHP-FPM – https://benjr.tw/95767
沒有解決問題,試試搜尋本站其他內容
有一次遇到下面的錯誤訊息
修改 SELinux 為 disabled 就可以使用了.
設定 selinux 請參考 http://benjr.tw/95368