![]()
如果有部分網頁要設定給已登入的特定使用者,這時候需要額外安裝 User Access Manager plug-in- https://wordpress.org/plugins/user-access-manager/
安裝可以透過 控制台 / 外掛 / 安裝外掛 / 搜尋 User Access Manager ,安裝完成之後啟用外掛,會在 控制台 看到 UAM (User Access Manager) 的設定選項,只要三個步驟就可以完成文章權限的設定.
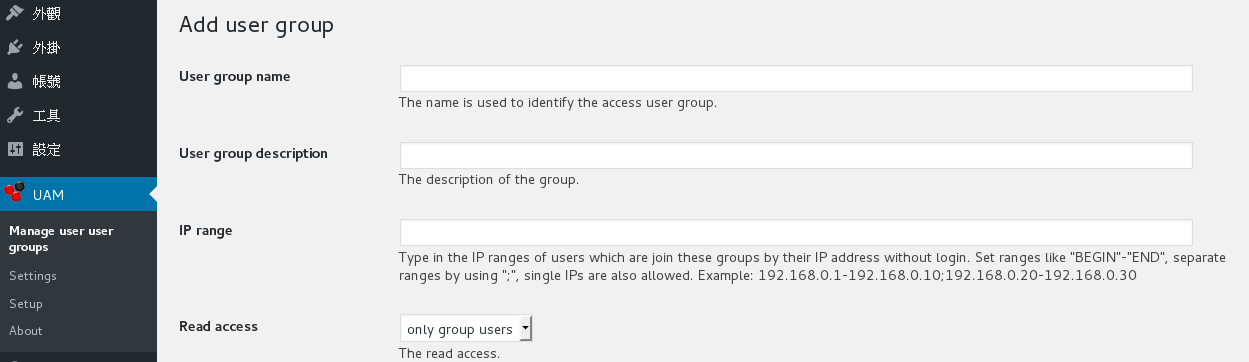
- 新增一個 Group
在 控制台 / UAM / Manage user user groups / Add user group ,新增加一個群組(使用者需要加入這個群組),文章就可以針對不同的群組做設定. - 設定使用者權限
在 控制台 / 帳號 / 編輯 (使用者) / Set up user groups ,勾選剛剛新增的群組. - 設定網頁權限
在 控制台 點選 文章 新增 或是 編輯文章 右方設定頁面上有一個 Access 選項,勾選剛剛新增的群組.
現在管理者會發現文章的標題後面多了 [L] 標記這是有設定專屬群組權限的文章 ( 可以在 控制台 / UAM / Settings / Other settings / Admin hint text 設定中修改標記名稱).
沒有權限的使用者 文章的內容會顯示成 Sorry you have no rights to view this post! ( 可在 控制台 / UAM / Settings / Other settings / 頁面 setting 設定中修改沒有權限的提示訊息).
其他有支援的功能
- User groups
- Set separate access for readers and editors
- Set access by user groups
- Set access by post categories
- User-defined post/page title (if no access)
- User-defined post/page text (if no access)
- Optional login form (if no access)
- User-defined comment text (if no access)
- Hide complete post/page
- Hide pages in navigation
- Redirecting users to other pages (if no access)
- Recursive locking of posts/pages
- Limited access to uploaded files
- Full integrated at the admin panel
- Multilingual support
- Also protect your rss feeds
- Give access by IP-address
- Plugin-Api to use the User Access Manager in your on plugins or extend other plugins
沒有解決問題,試試搜尋本站其他內容